A Showstopping Chocolate-Raspberry Trifle
9/21/2024 | 27m 55sVideo has Closed Captions
Chocolate-Raspberry Trifle, champagne cocktails; tips for shaping doughs
Host Bridget Lancaster makes a showstopping Chocolate-Raspberry Trifle. Techniquely host Lan Lam shares tips for shaping doughs, and host Julia Collin Davison makes a celebratory Champagne Cocktail.
America's Test Kitchen is presented by your local public television station.
Distributed nationally by American Public Television
A Showstopping Chocolate-Raspberry Trifle
9/21/2024 | 27m 55sVideo has Closed Captions
Host Bridget Lancaster makes a showstopping Chocolate-Raspberry Trifle. Techniquely host Lan Lam shares tips for shaping doughs, and host Julia Collin Davison makes a celebratory Champagne Cocktail.
How to Watch America's Test Kitchen
America's Test Kitchen is available to stream on pbs.org and the free PBS App, available on iPhone, Apple TV, Android TV, Android smartphones, Amazon Fire TV, Amazon Fire Tablet, Roku, Samsung Smart TV, and Vizio.
Providing Support for PBS.org
Learn Moreabout PBS online sponsorship♪♪ ♪♪ ♪♪ ♪♪ -Today on "America's Test Kitchen," Bridget makes a showstopping chocolate-raspberry trifle... and Julia makes champagne cocktails.
It's all coming up right here on "America's Test Kitchen."
"America's Test Kitchen" is brought to you by the following.
-Plugrà European style butter was created for all chefs, cooks, and bakers, slow-churned with 82% butterfat for a smooth texture and more pliability for flaky crusts.
Plugrà -- from professional kitchens to your home.
-On an American Cruise Lines journey along the Columbia and Snake Rivers, travelers retrace the route forged by Lewis and Clark more than 200 years ago.
American Cruise Lines' fleet of modern riverboats travel through American landscapes to historic landmarks where you can experience local customs and cuisine.
American Cruise Lines, proud sponsor of "America's Test Kitchen."
-The Breville Smart Oven Air Fryer Pro has over 13 functions.
Super Convection technology puts air-frying, dehydrating, and proofing at your fingertips, with space to feed the whole family and compact enough to sit on your countertop.
Results made simple.
♪♪ -Trifle is a classic British dessert, and like most recipes, it's evolved over the years.
It started off as just a light, frothy dish made with thickened cream, flavored with some rosewater, a little ginger, some sugar.
Then they started adding cookies like almond biscuits or macaroons soaked in sweet liqueur.
And then cake was added, followed by fresh fruit and so on, which brings us to today.
And Bridget's gonna show us how to make a modern trifle with all the bells and whistles.
-And this is a real showstopper.
We are making one that is definitely fit for a special occasion.
But you're right -- trifles can be all different sorts of combinations.
Our trifle is a chocolate and raspberry trifle.
-Mmm!
-So, we're gonna make a stovetop custard, so we've got 1/2 cup of sugar.
I've got 3 tablespoons of cornstarch.
We're using cornstarch instead of flour just because we want a silkier, slipperier custard.
We've got 2 tablespoons of Dutch processed cocoa -- this is the first of the chocolates that we're adding here -- and a little bit of salt just to balance everything out.
This is 1/4 teaspoon of table salt.
So I'm using my saucepan here as a mixing bowl.
First up I've got a little bit of milk here.
This is 1/2 cup of whole milk.
Going to add that right in there.
And 3 egg yolks.
Just the yolks.
These are from large eggs.
And I'll whisk this together until everything is nice and smooth.
That looks great.
And now the rest of the milk -- 2 1/2 cups more of whole milk.
And I do recommend using whole milk here for a rich, luxurious custard.
You could probably get away with 2% milk, and if you did use skim milk, you just have to understand that the custard is not gonna be quite as rich.
-Yeah.
-So now I'm gonna turn the fire on to medium here, and I just wanna start whisking this gently but frequently.
So what I'm looking for is that this is gonna thicken and you're gonna see bubbles all across the surface.
So that's gonna take about five, maybe seven minutes.
-Alright.
-Alright.
-Mmm.
That looks nice and thick.
-Isn't it gorgeous?
So I wanna just show you it's bubbling all over.
You wanna let it go for about 30 more seconds to ensure that the cornstarch is totally activated.
But this is great.
So, it's blooping all over.
Slide this off heat.
And now another little bit of chocolate.
This is 4 ounces of bittersweet chocolate.
We're adding it off heat here so that it can just melt in gently.
I finely chopped that.
And then 5 tablespoons of unsalted butter.
There we go.
And I'll whisk this until it's nice and smooth.
I'm just whisking, again, gently.
I don't want to incorporate a lot of air in here.
We're looking for chocolate custard, not chocolate mousse.
Look at that.
Just turns rich.
Alright.
So, got a couple other flavor additions.
I've got 1/2 teaspoon of espresso powder.
I'm gonna add 2 teaspoons of vanilla extract right in there just to dissolve the powder.
Alright.
Last a little bit of whisking.
Alright, that looks beautifully smooth, but sometimes little lumps can show up in the bottom of the pan, especially in the corners.
So I'm gonna take this over here to my fine mesh strainer set over a bowl, and just pass it right through that strainer.
Alright.
So let me just get the rest of this through here.
So that looks great.
This has to go into the fridge.
But before it does, I'm gonna put a piece of parchment paper that's been really well greased right on top.
You know the score here.
This is to keep away the dreaded pudding skin.
Now this is going to go into the fridge, and we really want it to cool down at least four hours in there, but you can do this up to two days in advance if you don't tell your kids that it's in the fridge.
-[ Chuckles ] -Raspberry time.
-Mmm!
-So we've got the chocolate, yeah?
Now we're on to the raspberry.
So, I have 1 pound of fresh raspberries here.
We're gonna add 1/2 of this to our saucepan.
Alright.
So that's 1/2 pound right in there.
There we go.
Now we're going to add 3 tablespoons of sugar.
And to thicken this, it's 1 teaspoon of cornstarch -- not a lot.
And just a dash of salt.
Dash!
And I'll use my potato masher here to crush all this.
-Ahh.
-Just speeds things up.
Alright.
So that looks good.
Medium heat.
And similar to the custard, we're gonna look for this to thicken just a little bit and start to bubble, and that's only gonna take about three, maybe up to five minutes.
-Okay.
-This is thick enough.
That was just about three minutes.
So now we're gonna pour this into the rest of our fresh berries here.
We created a very tasty adhesive glue.
-[ Chuckles ] -I'm just going to fold this together.
And you can see what a beautiful mess that it is.
-It is gorgeous.
-Alright.
So now we're gonna move on to making a chiffon cake.
So, I've got here some cake flour.
This is 5 1/3 ounces, or 1 1/3 cups.
We're gonna add quite a bit of sugar -- 3/4 cup of sugar.
That's just how it is with chiffon cake.
-Mm-hmm.
-And we've got a little bit of baking powder.
The old chiffon cakes just really relied on beaten egg whites alone, but the baking powder is kind of insurance.
-Oh, yeah.
-Yes.
So this is 1 1/2 teaspoons.
And 1/4 teaspoon of salt.
There we go.
Just whisk this together.
And you really do need to use cake flour for this.
It makes a much lighter cake.
Alright.
So that looks great, so now we're gonna add some of our liquid ingredients here.
I've got 1/3 cup of vegetable oil.
You just wanna use a very flavorless oil in here.
And a little bit of water.
This is 1/4 cup of water.
A couple of egg yolks go right in there.
Large egg yolks.
And 2 teaspoons of vanilla extract.
-Mm!
-There we go.
And I'll whisk all this together until it's nice and smooth and I've worked out any lumps.
-Oh, that smells good.
-That looks nice and smooth.
I'm just gonna set that aside for a second while we work on our egg whites.
So, I have 5 egg whites here.
So we're gonna put this into our standing mixer.
I fitted it with a whisk attachment.
And a little bit of cream of tartar.
This is 1/4 teaspoon.
So I'm gonna start the mixer on low, just to break up the egg whites, get it a little bit foamy.
That takes about a minute.
[ Mixer whirring ] Alright.
So, the egg whites look a little foamy there.
Now I'm gonna turn this up to medium-high.
I'm looking for soft peaks at this point, so that's gonna take between two to three minutes.
Alright.
These are looking close.
-Mm-hmm!
-Nice.
When you can start to really see the distinctive trail of the beater, that's how you know it's time to start checking.
Alright.
And I'm looking for soft peaks, so we should see a little curlicue.
-Aww.
-Yeah.
-Perfect!
-Little soft peaks.
Okay.
So we want to bring the texture of our batter closer to this fluffy texture of the egg whites -- tempering it, basically.
So I'm gonna add 1/3 of our egg whites in there, and I will just use a whisk to mix this in.
If we were to dump everything in all at once, we would deflate too much of the egg white.
And, really, with a chiffon cake -- any kind of foam cake -- the egg whites play such an important part in leavening.
Alright.
At this point, I'm done with this whisk.
Alright.
And now I'll add the rest of our egg whites.
And now I'm going to fold these in, just cutting through the middle and scraping around the sides of the bowl.
We don't really want any streaks in this cake.
So that looks fantastic.
Alright.
We've got a rimmed baking sheet, 18 by 13 inch, and we've lined it with parchment paper and then greased the paper.
This can be a very sticky batter.
We wanna make sure that this comes out.
And we're baking it in a sheet pan because it's gonna be so much easier for us to cut the pieces... -Right.
-...to make our trifle later on.
And you can use a rubber spatula to spread it out, but I like to use a little offset.
Just it's nice to get it into the corners.
Alright, so that looks pretty level, wouldn't you say?
-Yeah.
It looks perfect.
-Okay.
And now this is going to go into a 350-degree oven's middle rack.
I'm gonna let it go in there until I press in the center of the cake, it's gonna spring right back at me, and that's gonna take anywhere between 10 to 13 minutes.
Mmm.
Vanilla cake.
-Oh, it has such a lovely homey smell.
-Doesn't get much better than that.
Alright, let's take a look and see if it's done.
Again, I just wanna press into the cake just gently... and it should spring back.
Yeah.
Isn't that lovely?
-Mm-hmm.
-Okay, so we need to let this cool in the pan for about five minutes.
That's really important.
It's gonna help to set the structure, but also the cake is gonna start to shrink away from the edges of the pan, make it easy for us to get it out.
-Alright.
-Alright.
Our cake has cooled just a little bit.
-Oh, yeah.
-And you can see that it's separated from the edges.
Well, most of them.
So it's still a good idea to take a paring knife and just run it around the edge.
I'm gonna turn it out onto another wire rack.
Great to keep a few of these on hand.
-♪ Dun-dun-dun, dun ♪ -Exactly.
-Et voilà.
-It's a little warm there.
Be careful.
And now I'm going to take the parchment off.
-Ooh!
Nicely done.
-So now re-invert it.
Always make sure not to press down on it.
[ Both chuckle ] -It is a delicate cake, after all.
-Exactly.
So that's our cake.
-Perfect.
-We're gonna let this cool completely.
-That was easy.
[ Chuckles ] -That was easy.
But it will be ready when we are.
♪♪ -Rounding a ball of dough for a roll or a loaf of bread is the step that happens before the final proof and bake.
You're stretching the gluten at the surface of the dough, and that extra tension, it helps it hold its shape.
Think of it as putting a sleeping bag into a sleeve -- just as that sleeve gives the bag shape, a well-stretched exterior gives rolls and loaves the structure they need to bake up tall and shapely.
Now, if you're making a loaf of bread, you're gonna use two hands.
If you're working with just a small amount of dough, you're just gonna need one hand and you'll cup it over the dough.
Whatever the size of the ball of dough, the goal is to drag it against the counter in order to put tension on the gluten at the surface.
For this to happen, the dough needs to grip the counter.
You can see that this is skidding across, and that's not gonna do anything for us.
So if you find that it is skidding, you can just moisten the counter lightly with some water to help the dough adhere.
And then it's just a matter of pressing the dough and pushing this bit of dough underneath.
And as you do, it's gonna naturally rotate in your hand and you'll see that the surface gets tighter and tighter and tighter.
You'll know you got this right when the surface of the dough is smooth and taut, and when you lift it up and you can see that everything has been gathered at the bottom.
If you're taking the time to make bread at home, it's absolutely worth it to learn how to do this.
All it takes is a little practice.
♪♪ -It's assembly time.
-I can tell.
-Exactly.
We do have one more step to do -- I'm gonna whip a little bit of cream -- but this is our beautiful trifle bowl here.
You always have to use a clear trifle bowl because it's all about those beautiful layers.
Just stunning.
So, let's get over here to the cream.
I've got 1 cup of very cold heavy cream here, and the bowl is obviously super cold, the beater's cold.
These have been sitting in the freezer.
You know it.
Cold cream just whips better.
-Sure does.
-Alright.
So that goes right in.
And 2 teaspoons of granulated sugar.
Just a little bit.
There's a lot of sweetness going on in there.
-Mm-hmm.
-Don't need too much.
Alright.
So I'm gonna start this on low just to get it frothy for about a minute.
Alright.
So I'm going to beat this at high now that it's got a little bit foamy.
We're gonna leave this in there, let it beat until it's soft peaks.
So that's gonna take about a minute.
Alright.
Let's turn this off here.
Let's take a look at this.
I might even finish it by hand.
Alright.
So I'm just gonna use that whisk attachment.
I think we are there.
Let's take a look.
Little soft peak there.
-Aww.
Perfect.
-Alright.
Let's get back to our cake.
I've moved it to a cutting board here.
-Nice and cool.
-Completely cooled.
And now I just wanna trim those edges.
-Mmm, snacks!
-Yeah, exactly.
We're doing this not just for looks, but also because the cut edges do absorb the ingredients that are in the trifle a little bit more.
Okay, so now we're gonna cut the rest of this cake into 24 squares.
We're gonna go six this way and four that way.
Alright, we're gonna leave this be for a second and move over to our bowl and our raspberry mixture.
-Okay.
-So we're going to add raspberry to the bottom here, so I'm just gonna use a half-cup measure here... and I'm gonna plop it right into the center.
So we're just giving a very, very thin layer of raspberry at the bottom.
Rotate the dish as you need to.
-Looking pretty good there.
-Yeah, it is.
So that is the raspberry layer.
Now I'm gonna take one square of cake, and I'm just going to break it into four pieces here.
We're gonna start layering these right in the center... ...kind of making a little bit of a mound in there.
We're filling that center in.
This also -- We're creating kind of a scaffolding.
Alright.
And now I'm gonna take 10 more pieces, and I'm gonna start to stack these kind of shingle style around the exterior of the dish, and I wanna make sure that the outside edge is touching the trifle bowl.
And then 10 gets that little overlap and underlap, right, with that first piece.
-Mm-hmm.
-So over that last piece and under the first piece.
And now we're gonna fill in that center with four smaller pieces of cakes.
Now, one very important component of trifle is booze.
We're using rum here, and I've got 3 tablespoons right here that I'm gonna use.
Sprinkle it over the cake.
It's just gonna get soaked up.
Now, if you don't drink or you don't wanna have any alcohol in the trifle, we actually have a really great option that uses raisins... -Mm-hmm, and molasses.
-...molasses, and a little bit of black tea.
-Yeah.
It's great.
And you can find that on our website.
-Alright.
So this is looking great.
Bring that pudding right over here.
Switch with you.
I'll need the raspberry in a moment, but I wanna get this closer to my trifle.
You can see this custard is very thick.
-Mm-hmm.
-We want it to loosen just a little bit, so I'll give it a whisk.
Alright, so I'm gonna add half of this to this particular layer, and I'm gonna use a spoon here.
And I don't put it right at the edge.
I put it towards the cake and let it kind of fall and slump towards the side of... -Ahh.
-...the bowl.
Isn't that gorgeous?
Alright, so now I'm gonna go back with my spoon here and I'll add a little bit to the middle.
I'm just gonna force some of that chocolate towards the edge, make it a little bit more even.
So, this is looking fantastic.
We're gonna add in this whipped cream -- all of it at this point.
-All of it?
-And we'll really use that cream to kind of level off the trifle for us.
So once again, I'm just gonna work it towards the sides, kind of pushing it a little bit.
You wanna make sure that it's relatively even in thickness before it touches the glass.
So let me just turntable this here and kind of scrape it, even it out.
Alright, next up -- the rest of our raspberry mixture.
It was just 1/2 cup in the bottom just to kind of set a little bit of color, but we're gonna have a thicker layer here.
And instead of plopping it all in there, which would totally just make all the whipped cream go to the sides, I'm gonna spoon it in nice and gentle towards the sides.
Small spoonfuls are good.
Alright, let's get some in the center there.
And then I'll grab that spatula, kind of coax it.
Alright, so that looks pretty even.
-Gorgeous.
-Thank you.
Moving on to a second layer of the cake.
So same thing that I did with the first one -- breaking it up into four pieces in the center.
And then, once again, just going in that fallen domino pattern, 10 more touching the outside of the dish... and one remaining piece.
Break it up into fourths, right in the center.
Fill it in.
Alright.
So let me just press this down.
This is the mushing part.
The rest of the rum is here.
It's another 3 tablespoons of rum.
-Alright.
There's only one bowl left standing.
-Rest of the pudding going in.
Near the edge.
Not quite at the edge.
Alright, now this is our next-to-top layer here, so I wanna make sure that it's even.
Just gonna spread this.
So, this looks fantastic.
-Gorgeous.
-Now there will be one more layer of whipped cream right before we serve it, but I want to whip that close to serving so it doesn't collapse too much.
But for now, we're gonna put a little piece of plastic on this and it's gonna go in the fridge.
So this is going to slump and kind of fall into each other, but the flavors really start to meld, even improve.
I love this 'cause it really is made for making in advance.
Now, you wanna leave it in the fridge for at least six hours, but this can be made up to this point two days in advance.
So I'll go put this in the fridge right now.
-Alright.
So as Bridget mentioned earlier, it's best to have a cold bowl, beater, and, heavy cream when making whipped cream.
Here's why.
Heavy cream contains at least 36% butterfat in the form of droplets dispersed throughout a watery emulsion.
Whipping the cream mixes air into it, as well as breaking up the droplets of fat.
As the cream fills with air bubbles, the fat forms the surface of each bubble, holding the air in place, making the whipped cream stand up tall.
Butterfat, of course, becomes soft and liquidy when it's warm, so if we try to whip cream that's not cold enough, the fat isn't firm enough to hold on to the air bubbles.
It just floats to the surface, where we get greasy, liquid cream.
And that's why, for the best whipped cream, you should chill the bowl, the beater, and the heavy cream itself.
-Alright, you know it's almost time to eat this when the final whipped cream comes out.
This is just another cup of that heavy cream and 2 teaspoons of sugar.
Whipped it exactly the same way as the first batch.
And the trifle is very, very cold.
-Oh, yeah.
Nicely set up.
-Nicely set up here.
So I'm just going to finish this.
And you can pipe this on.
You can do little swoops and swirls.
Let me bring up those beautiful, magical gold triangles.
-Now, these are just chocolate and edible gold dust.
And we've got instructions for how to make them on our website.
-So we're gonna add these around the perimeter of our trifle.
Alright, so let's get some of these little chocolate pieces.
You can add more, less, however you want.
-[ Chuckles ] I love it.
-Alright.
One last thing to do -- some more raspberries.
Just a few fresh raspberries around the top, higgledy-piggledy, wherever you'd like.
-That is gorgeous.
-What do you think?
Special occasion worthy, right?
-It's special occasion worthy.
And to go with that, I'm gonna show you how to make a quick champagne cocktail.
-Good, 'cause I am thirsty.
-[ Chuckles ] I know.
You mentioned you were earlier.
-Mm-hmm.
-Alright, it's a champagne cocktail -- a mixture of champagne, a little bit of extra sugar with some bitters.
-Nice.
-This is Angostura bitters.
Onto each sugar cube, I'm gonna put about 1/4 teaspoon of bitters.
-Okay.
-Alright.
I'm gonna drop a sugar cube into each champagne flute.
And now [chuckles] for the champagne.
Or sparkling wine, if you like.
Now, you don't wanna use a really fancy one because obviously we're flavoring it, but you wanna use one that's Brut or Extra Brut, again, because that means it's dry, not too sweet, 'cause we're adding the sugar.
-Right.
Right.
-So you notice I'm taking the cage off which is holding the cork in, but I'm really putting my hand on it.
Some people use their thumb.
There's a lot of pressure behind that cork, and you really don't want it to go flying.
-Yes.
-Alright, so to open a bottle of sparkling wine or champagne, I'm gonna tilt it, and I'm just gonna grasp the cork and just slowly spin it.
A really nice bottle of champagne should have a [smooches] like a kiss.
-Oh!
-Yeah.
And I'm almost pressing back on the cork.
[ Cork pops gently ] That was perfect.
-That's lovely.
-Yeah.
Alright.
You can see it didn't boil over.
We didn't lose any.
And I'm gonna hold the glass at an angle, about a 45-degree angle.
So, the first pour you get a lot of bubbles, but you can go back.
Want a little more than that.
We'll top it off just a little bit.
And then you can take, you know, a lemon.
You want a little bit of lemon flavor.
Take a lemon peel.
You can use a channel knife or just a peeler and cut it.
Sprit a little of that lemon oil right over the top, then drop it onto the side.
To get this nice curl, wrap it around a chopstick or something like that.
Alright.
Gonna set these aside while you build our plates of trifle.
-Okay.
But I am going to select one of these beautiful gold triangles... -Ohh.
-...for each of our plates here.
-How many does this serve?
-This serves at least 12 or up to 16.
-Wow.
-Yeah, and even more.
If, like, you have a party or an open house during the holidays, little spoonfuls of this to give out, it'll serve a lot more.
Now, as I said before, one of the best things about trifle is it's flumpy.
-[ Laughs ] -That's exactly what it's like.
And you get that custard, that cake -- that beautiful cake that's been soaking with a little bit of that rum.
-Oh, yeah.
-And myself here.
-Alright.
-Alright.
-Oh, my goodness.
-Mmm!
It's not too sweet.
You taste the chocolate, the raspberry, and you have that delicate cake, hint of vanilla in it and just a hint of rum.
-But what I love about it is the textures.
That custard is almost buttery, and then the cake has that pillowy softness to it.
-Ohh.
-That's great.
Match made in heaven.
-Yeah.
Bridget, thank you for showing me how to make this gorgeous and ethereal trifle.
-It's heavenly.
-It is heavenly.
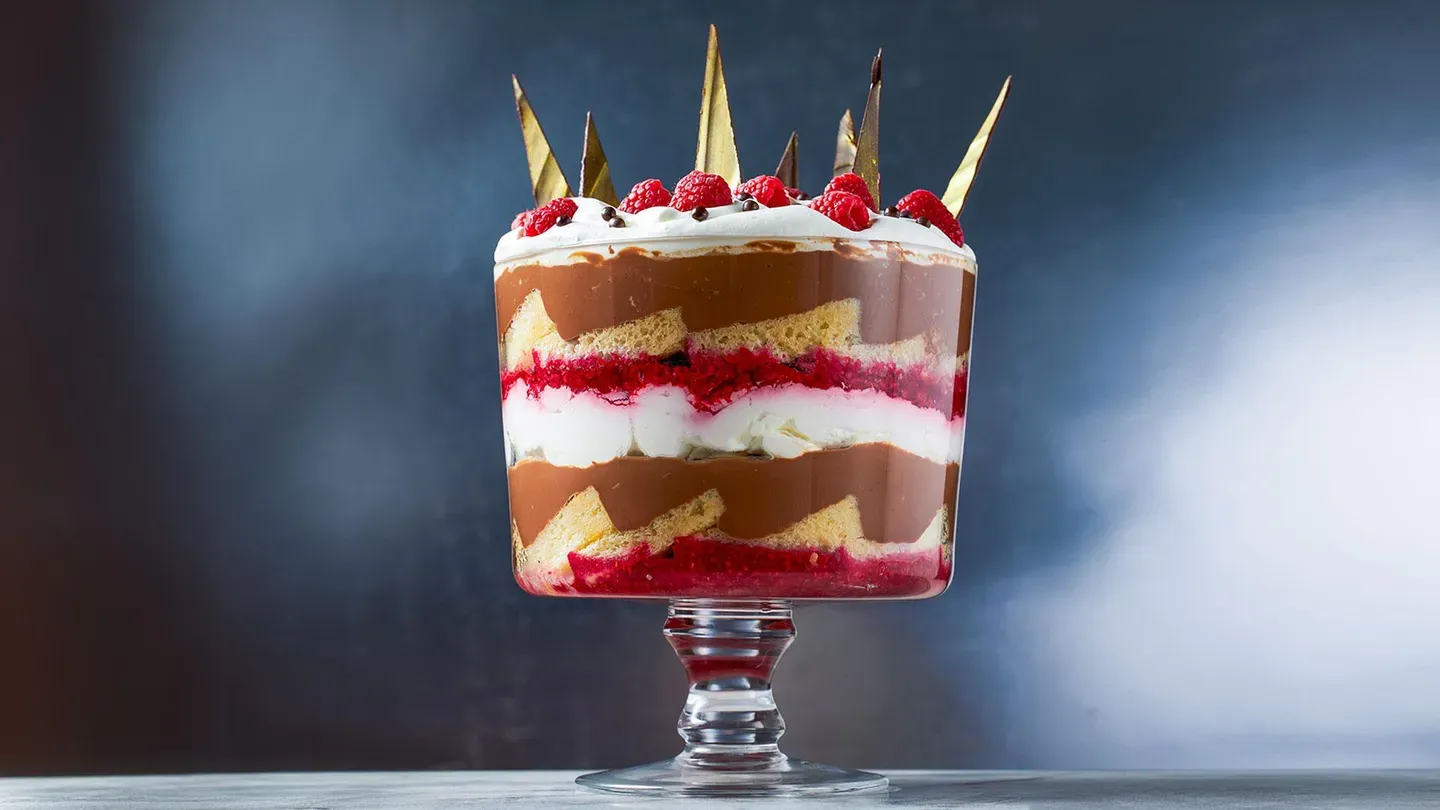
If you wanna make this showstopping trifle, make a deep chocolate custard using Dutch processed cocoa and bittersweet chocolate, cook half of the raspberries down into a jam, make a big flat chiffon cake, assemble everything into a tall trifle bowl, and decorate with shards of chocolate.
From "America's Test Kitchen," a spectacular recipe for chocolate-raspberry trifle.
You can get this recipe and all the recipes from this season, along with select episodes and our product reviews at our website, AmericasTestKitchen.com/TV.
-Alright, one more cheers.
-One more cheers.
'Cause we can.
-Mm-hmm.
-Mmm!
-Visit our website to sign up for our free e-mail newsletter, with more revolutionary recipes and the stories behind 25 years of test-kitchen discoveries.
AmericasTestKitchen.com/TV25.
From the cooks and editors of "America's Test Kitchen," Cook's Illustrated magazine has been all about the why and how of cooking for over 30 years.
Get a year of award-winning reporting, science-based discoveries, trusted reviews, and more.
The cost is $19.95.
That's 63% less than the cover price.
To subscribe, visit CooksIllustrated.com/ TVsubscribe.
"America's Test Kitchen" is brought to you by the following.
-Plugrà European style butter was created for all chefs, cooks, and bakers, slow-churned with 82% butterfat for a smooth texture and more pliability for flaky crusts.
Plugrà -- from professional kitchens to your home.
-On an American Cruise Lines journey along the Columbia and Snake Rivers, travelers retrace the route forged by Lewis and Clark more than 200 years ago.
American Cruise Lines' fleet of modern riverboats travel through American landscapes to historic landmarks where you can experience local customs and cuisine.
American Cruise Lines, proud sponsor of "America's Test Kitchen."
-The Breville+ app has over 1,300 guided recipes from culinary professionals, cook guides that help you turn what's in your fridge into quick meals, plus live and on-demand classes, all tested and tuned for your Breville appliance.
♪♪ ♪♪ ♪♪ ♪♪ ♪♪ ♪♪


America's Test Kitchen is presented by your local public television station.
Distributed nationally by American Public Television