E4 | Nashville Brick Cottage | A Grand Time At The Opry
Season 46 Episode 4 | 23m 42sVideo has Closed Captions
The crew tours the Grand Ole Opry and meets a country music star.
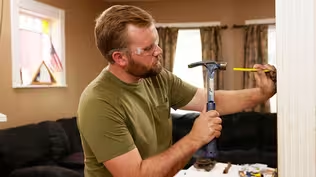
Kevin O'Connor helps Javier with the roof plumbing penetration. Tom Silva and Jenn Nawada get a tour of the iconic Grand Ole Opry. Jenn goes backstage and meets a country music star. Richard Trethewey checks in with plumber Trevor Hasty while he works on plumbing in the primary bathroom. Tom and Lyn install an all-in-one aluminum pocket door frame for the new pocket door to the primary bedroom.
Problems playing video? | Closed Captioning Feedback
Problems playing video? | Closed Captioning Feedback
Funding for THIS OLD HOUSE is provided by The Home Depot and Renewal By Andersen.
Support provided by:

E4 | Nashville Brick Cottage | A Grand Time At The Opry
Season 46 Episode 4 | 23m 42sVideo has Closed Captions
Kevin O'Connor helps Javier with the roof plumbing penetration. Tom Silva and Jenn Nawada get a tour of the iconic Grand Ole Opry. Jenn goes backstage and meets a country music star. Richard Trethewey checks in with plumber Trevor Hasty while he works on plumbing in the primary bathroom. Tom and Lyn install an all-in-one aluminum pocket door frame for the new pocket door to the primary bedroom.
Problems playing video? | Closed Captioning Feedback
How to Watch This Old House
This Old House is available to stream on pbs.org and the free PBS App, available on iPhone, Apple TV, Android TV, Android smartphones, Amazon Fire TV, Amazon Fire Tablet, Roku, Samsung Smart TV, and Vizio.
Keep Exploring


This Old House Insider Newsletter
Get This Old House exclusive stories, tips, and behind-the-scenes information delivered right to your inbox every month.Providing Support for PBS.org
Learn Moreabout PBS online sponsorshipKevin: Today on "This Old House"... A plumbing penetration is one of the most vulnerable places on a roof.
So we are going to seal them up and blend them in.
Richard: Then we'll reveal how the homeowners are going to heat and cool this century-old building.
Tom: And we'll take a trip to country music's biggest stage and talk to one of its biggest stars.
♪♪ Man: Ahh.
That's it.
♪♪ ♪♪ ♪♪ Kevin: Hey there, I'm Kevin O'Connor, and welcome back to "This Old House" and to where we're working in East Nashville, Tennessee, just about three miles outside of downtown, renovating this 1920s brick cottage.
Morning, Javi.
Javier: Hey, Kevin.
Kevin: So, we're not changing the footprint of this house at all.
That's important here in the Historic District.
But the homeowners did want to pick up some extra living space.
And they're doing that by raising the height of the basement 10 feet and completely rebuilding that.
So, you may recall, we rolled this house off of the old foundation, set it temporarily in the backyard, and then rebuilt the new foundation with 10-foot-high precast concrete walls.
The house then came back onto that foundation, and currently is sitting just about 1/4 inch above it.
Over the past couple weeks, the crew has been here doing demo.
We have taken it back to the studs, and then the framers came in to put up the partition walls.
So now we've got a new floor plan.
Let me walk you through it.
This was the dining room.
It's going to become a music room right there.
The original living room's floor plan stays just about the same.
Fireplace stays.
This wood treatment goes away.
On the other side of this wall, what was a primary bedroom becomes a new office space.
And then as you walk through this opening right here, you may recall that the old kitchen, which was small and narrow, it ended right here.
That wall came down to open this up so that we have kitchen and dining room and the ability to walk out onto a new deck into the backyard.
Right here was the only full bath in the house.
That is gone.
We have framed out for a half bath down here and we've picked up a lot more space up top.
The second floor was basically an unfinished attic with a narrow central staircase.
Now new living space, which you're going to access by a new staircase right here.
And all of this living space is basically made possible by a new dormer put off the back of the house.
No additional footprint -- [ Banging ] You can hear the guys up on the roof getting ready to shingle it.
No additional footprint, and you can't see the dormer from the front street, which the Historic District likes.
So, there will be two bedrooms behind me right here for the kids.
They will have a full bathroom right in here.
And you can see this is the pocket door hardware that's being put together.
That's going to go right here.
And it's going to separate this space, with a play area between the bedrooms and the bathroom, from the primary suite.
As you walk in, there'll be a closet.
There will be a generous bedroom right in here.
And then we've got a second pocket door which will slide right here, closing off a new primary bathroom.
Now, as I said, all of this is possible because of the new dormer.
And they are actually putting the roof shingles on right now.
So I've got an appointment with Javier up on the deck.
Javi, I just checked out the downstairs, and you guys are making some serious progress.
Javier: Thank you, thank you.
Kevin: Yeah, I love it.
Javier: We are trying to give these people a better roof.
It got hit by a tornado in 2020, and the job was not done properly, so they were having leaks everywhere.
Kevin: So, even though they got a new roof after the tornado, it wasn't a good one.
Javier: It wasn't a good one.
Adam and Rachel didn't live here at the moment, but the neighbors told them that it was just storm chasers came in, did the roof, and out the next day.
Kevin: Hear that a lot.
So, what are you doing?
Javier: So now, as you can tell, we have the stick-and-peel in all the proper spots.
Kevin: This is the self-sealing membrane.
You peel it back, you stick it down straight to the deck.
And then if you go through it... Javier: no matter if you put nails through, it seals itself.
Kevin: You've got that in sort of the "critical," the weaker potential spots.
Javier: That is correct.
Kevin: But then right here, you've got a different underlayment.
Javier: We have a synthetic felt.
It allows the roof to breathe and not hold moisture.
Kevin: And that's away from the valleys, and that's nice and steep, so okay there.
I heard that you're also working on protecting our plumbing penetrations as well.
Can you walk me through this?
Javier: These penetrations are always a weak point in the roof.
Kevin: So, wait, this is -- this is, I presume, a vent.
From where?
Javier: This is our half bathroom on the first floor.
Kevin: Oh, terrific.
Okay.
Javier: So, what we're going to do with this boot, and what this boot does -- it's made out of complete metal.
As you can tell, there is no plastic components that will deteriorate with time.
You can adjust this anywhere from a 3-inch pitch to a 12-inch pitch and adjust it, and it will have your boot looking straight.
Kevin: So, depending on what the pitch of your roof is, you can always get this so that it's plumb.
Javier: That is right.
Kevin: Okay.
Javier: And we have this other component that once it goes on here, what it does -- it inserts in this pipe, all the way in.
And what this is going to do is going to give this little boot some extra stability and sustain high winds.
Kevin: Nice.
I like that.
Okay.
And are you ready to install this?
Javier: Let's do it.
What I want to do first, Kevin, is use some of this self-sealing member.
Kevin: Yeah.
Got that.
Okay.
Javier: And then if you hold it on that end, I'll hold it on this end.
Slide it through.
Nice.
Nice and tight.
And I also have these pieces right here, Kevin, that I want to put around, maybe like on the bottom, and then it goes up a little bit.
That keeps it tight.
Kevin: Okay.
That's in.
Let me put mine on here.
Javier: Alright.
Nice and tight.
Kevin: Okay.
That's down.
Javier: So we are ready to nail this right here.
Kevin: We want to get this cap down in here.
Make sure it goes where it's supposed to before we nail off.
Hang on.
That just seated into the PVC.
Javier: Oh, yeah.
Beautiful.
Boom!
Kevin: Oh, look at that.
Javier: Yeah.
Can I see that hammer?
Kevin: Yes, sir.
Javier: Thank you.
Kevin: So, this is nice because right here, those nails are going through this sticky membrane, so that's self-sealing.
Javier: That's right.
Kevin: Let's make sure -- and through a shingle with the self-sealing beneath it on this course.
Javier: We're going to grab another piece of the self-sealer and I'm going to put it on top, and that'll give us a little bit of extra protection.
Kevin: Okay.
Like that?
Javier: So now this is on.
We're going to go ahead and finish the shingles.
Kevin, I went ahead and did a little bit of pre-cutting.
That way it fits.
You see how this fits right now?
Kevin: Oh, yeah.
Okay.
So you're just continuing the course to your left.
Javier: That's right.
Kevin: And so they give you a strike zone here marked out.
So you can just fly on this roof when you got the gun.
Javier: And then we're going to put this one last shingle above this boot.
Kevin: Also pre-cut.
Very nice.
Javier: Also pre-cut.
Kevin: You good there?
Javier: I'm good here.
Last one.
Kevin: Nice.
We got it covered on the top.
We leave the bottom exposed where it can run out.
And that's sweet, Javi, right there.
So no storm chaser job here, right?
Javier: No, sir.
No storm chasing here.
Kevin: Good for another 20, maybe 50 years.
Thanks, Javi.
Javier: Thank you Kevin.
Richard: So, even though this is a renovation, from a plumbing and mechanical standpoint, fundamentally this is a new house, a new build.
So the plumbing and mechanical is underway here in the basement.
We had to start by having the plumber run the drain lines that will go underneath our future poured slab right here.
There's a sewer line that goes right out to the sewer, and there's a branch that comes over here.
So, the rough-in right here is for the half bath down here in the basement.
And then right above us on the first floor will also be a half bath that'll rough down to here as well.
And in this back corner, we're going to have a mechanical room.
And what we're doing is actually using a furnace that's two or three years old that they had just put in.
And we're going to reuse that furnace right here with a condenser outside, so they'll have heating and air conditioning.
And we're going to run new ductwork from this point out, and we're going to service the basement and the first floor.
So the ductwork over here is pretty straightforward.
There's plenty of height and everything else.
But when we get to the center, we're going to have footings right here that'll go up and there'll be a triple laminate beam right there supporting everything.
It'll be a bit of a challenge for us to get that ductwork across to right here, but when we do, we're going to take these beautiful cast-iron registers, original to the house, and what we're going to do is relocate them and actually put them into the living room and make them real showpieces on that first floor.
So, down here in the basement and the first floor, it's pretty straightforward from a ductwork standpoint.
Now, upstairs, there's a few challenges.
So, up here in the top floor, this was unheated attic, and now all the bedrooms are up here.
So it's a perfect case for putting in a couple of heat pumps.
But we had to start with where we could put them.
The first logical place for a ducted unit was right here under this knee wall.
You can see the unit right there, hung and isolated for noise vibration.
But look, there's no place to run it here.
There's no attic.
So, what the installers did is they found a place to be able to send the supply down into the floor below my feet right here, in a joist bay.
Supply comes over here, comes up here, and now we'll feed the two kids' bedrooms right here.
What they're going to do is box this in to match the other side so it looks balanced.
So, now we've got the kids' bedrooms done.
We got this center area done.
But the primary needs its own separate system.
So, it was a perfect candidate to put one of these high sidewall cassettes right here.
And that's normally where people put them because oftentimes in retrofit it's the easiest to run the line sets and the wires.
But what we can do is right over this doorway, we actually put it right up here.
So you walk in the room, you see nothing, but the room's the perfect temperature.
So, our plumber Trevor is busy doing the rough-in up here in the primary.
How are you?
Trevor: Hi, Richard.
Richard: I double-checked all of your drain work down there.
It's beautiful.
Always in the right place, too.
Trevor: Good.
That's what I aim for.
Richard: What are you working on today?
Trevor: So, we're roughing in the vanity in the primary bathroom here.
Richard: Okay.
Trevor: Original plan showed a double vanity.
They decided to change it to a single vanity.
So we're going to come up with two drains anyways.
That way in the future, when they decide to add a second one -- Richard: Just in case they change their mind.
Trevor: ...it's there.
They don't have to open up the ceiling below us.
Richard: Alright, so you got two separate drains.
A lot of times, I would see a plumber come up and just do a double wye or a double tee-wye.
But you don't.
Trevor: Nope.
I don't like drilling through studs, because it weakens the wall.
And with this being a floating vanity, they need all the support they can get.
Richard: You need the structure to hold that thing up.
Trevor: That's right.
Richard: And they can change their mind.
Trevor: They can change their mind, too.
Richard: Alright, what else did you find on this primary bathroom that was a challenge?
Trevor: Well, as typical, shower drain is dead center of a beam.
Richard: Oh, it always is, isn't it?
Trevor: It always is.
Richard: And so I see that you've cut all the structure out.
Trevor: We have.
The framers will come back, box it out, give that structural back, then we'll put the drain in.
Richard: It'll be solid, and the drain'll be in the right place.
Trevor: That's correct.
Richard: Okay, good.
Any other tips or tricks you think about?
Trevor: I don't like noise, so we put expansion loops on all the water lines.
That way they don't pop and creak when you're using them.
Richard: So, when heated water goes through, the water wants to expand.
It just won't make that noise.
Trevor: That's correct.
Richard: Good.
So, a good job by you is not seen and not heard.
Trevor: That's right.
Richard: Good, my friend.
Thanks for all your good work.
Trevor: Thanks.
Tom: No trip to Nashville is complete without seeing country music's biggest stage, the Grand Ole Opry.
It's where you can see artists past, present and future under one legendary roof.
Terri: It's our house, you know.
It's the house we all gather.
It's the table we all sit at together.
Suzy: Stepping onto the Opry stage is like remembering every little exciting moment that you've ever had in the music business.
Pam: What's funny, I don't care how many thousands of people you've played in front of -- something about being in that circle feels kind of sacred.
Jenn: Hi.
Dan: Hey, y'all.
Dan Rogers.
Jenn: Dan, nice to meet you.
Tom: Hey, Dan.
Nice to meet you.
Dan: Nice to see you.
This is Jim, our backstage security officer.
Tom: Pleasure to meet you.
Jenn: Nice to meet you.
Dan: If you were anyone else, you would have to show your ID, and Jim would probably tell you what dressing room you're headed for, but we'll save you those pieces this evening, and I think we can start a tour of this great place.
Jenn: Yeah.
Tom: Let's go.
Dan: So this dressing room is called Into the Circle.
It's the first dressing room you pass when you walk into the Grand Ole Opry House.
And it is specifically for folks who are making their Opry debut that particular evening.
So, usually when I walk by this dressing room, one, it's full of people because everybody's here to see their son, daughter, grandson, granddaughter, what have you... Tom: I see.
Sure.
Dan: ...make their dreams come true.
And it's probably also the room where people are the most nervous.
Jenn: Right.
Dan: So, all of these quotes are either what someone had to say when they were onstage making their debut, or remembering that moment in their lives.
And my favorite thing about the room is that when you exit the room -- perhaps like you're walking to make your debut -- you see Taylor Swift's immortal words, "Oh, my God, I'm on the Opry!"
Jenn: That's great.
Tom: [ Laughs ] Dan: From September 1, 2006.
So, these shots -- you'll just see all kinds of shots back here, obviously.
But these are all from more recent nights at the Grand Ole Opry, some great collaborations.
And this place is really the heartbeat of the Opry House.
It's the family room.
In most places, you would hear this probably called the green room, but the Opry is family.
We call it the family room.
These are the shots that you would have, you know, over your fireplace if you had a photo collection at home of the Opry.
Tom: A lot of history here.
Dan: A whole lot of history.
And you ready to hit the stage yourself?
Tom: Oh, boy.
Jenn: Let's go.
Let's go.
Tom: Lead the way.
♪♪ Tom: Wow.
Dan: You have arrived.
Tom: This is amazing.
Dan: Nashville, Tennessee.
Grand Ole Opry, truly the home of country music.
Ground zero for country music.
Tom: How many people sit here?
Dan: 4,400.
And if I'm doing my job right, every seat in this place is filled.
Jenn: How many shows a week happen here?
Dan: More often than not, we're doing five, six, seven Opry shows a week.
Jenn: Wow.
Dan: Which means that in the past year, everyone from Garth Brooks to Brad Paisley to great bluegrass artists have walked to that really, really important piece of wood.
Tom: I was going to ask you about the circle.
Dan: So, that circle of wood was removed from the Ryman Auditorium, which housed the Opry from 1943 to 1974.
So, truly, when you step on that circle, you're stepping where greats like Patsy Cline, Hank Williams once stood.
I've seen people brought to tears on that circle.
There's just something really, really special about those planks of wood that intimidate folks.
Jenn: So, how is the place set up?
How are the musicians set up and organized?
Dan: We'll have a staff band out here.
The background singers are right here behind us.
And then in these pews are usually invited guests here at the Opry.
Tom: Well, where do we get to sit?
Dan: We're going to take care of you with some very special seating out here amongst the 4,400 folks, and we have something really special for this fine lady.
Jenn: Dan wasn't kidding about doing something special, because I got to meet country music legend Trisha Yearwood, who's been a member of the Opry since 1999.
Thank you for meeting with me.
Trisha: My pleasure.
Jenn: What's it like backstage here at the Opry?
Trisha: Well, on a regular night, these dressing rooms are all full, and you hear music in every room, and everybody just gets together and knows each other.
The halls are usually loud and fun and like, "Oh, hey, good to see you."
It's really is -- I always say the Opry's a family.
That's absolutely what it feels like backstage.
Jenn: How old were you when you knew that you wanted to sing?
Trisha: I knew at 5 that I...
I sang all the time.
I wanted to be Cher, actually, at 5.
Jenn: [ Laughs ] Trisha: And I kind of still do.
But I just loved music and I was singing all the time, and it just never went away.
Jenn: Yeah, yeah, yeah.
Trisha: And I remember praying about it and being like, "If I'm supposed to do something else, show me the path, show me what I'm supposed to do.
But if I'm supposed to do this, help me figure this out."
Jenn: That's cool.
So you just followed it?
Trisha: I did.
Jenn: That's amazing.
Trisha: Still following it.
Jenn: That's so great.
Tell me about tonight.
Trisha: It's about the women that have come before, and it's about my contemporaries.
We're going to do some music from the past, we're going to do some current stuff, and I'm really, really excited about it.
Jenn: You guys all empower each other.
Trisha: We do, and you know, there's this whole idea, I think, sometimes that women are always competing against each other, but there's such a camaraderie and a sisterhood here.
And the Opry really does encourage that and foster that.
Jenn: Awesome.
So, we're here with "This Old House."
We're on our 46th season and we're working in East Nashville.
Like, what's the flavor we should check out around town?
Trisha: East Nashville's funky and cool.
And you know, it has really changed in the last 10 years.
So, there's a mix of everything.
And what I love about East Nashville is the building that's happening there is a nod to what has been there.
There's a lot of, you know, keeping...
I'm a fan of keeping the bones of a building and keeping the structure and... Jenn: Right.
Trisha: It's a funky, cool area.
So that's going to be super fun.
You know, I do a lot of building with Habitat for Humanity.
So if you need, you know, I know how to do stuff.
Jenn: If we need an extra pair of hands?
Trisha: I have a nail gun and I have a drill and I carry, I bring my own tool belt.
So, just so you know.
Just putting it out there.
Just putting it out there, guys.
Jenn: I would love to work with you on-site.
Trisha: We're fans of "This Old House," so thank you for -- thank you for highlighting Nashville.
This is really awesome for us.
So thanks for being here.
Jenn: No worries.
Bring your tool gun.
Trisha: okay.
Jenn: Bring everything.
Trisha: I will.
Jenn: Alright.
Thank you.
Trisha: Thank you.
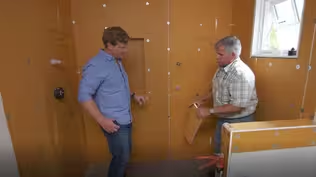
♪♪ Tom: Hi, Lyn.
What's going on up here?
Lyn: Hey, Tommy, how are you?
Tom: I'm well, thanks.
Lyn: Good, good.
We are putting in a pocket door frame today.
Tom: Right here, going into the primary?
Lyn: Yes, into the primary bedroom and the primary bathroom.
Tom: Right.
Well, we've done a lot of pocket doors over the years.
We've made our own frames out of two-by stock, plywood, all kinds of things, and there's all kinds of pocket frames that you can buy, whether they're steel with the wood combination, all steel, it doesn't matter.
You can get anything that you want.
It's all a matter of price.
Lyn: That's right.
Tom: And you got to be careful because you want to make sure that they last over time.
So, what did you have here?
Lyn: We have an all-aluminum frame that is cut to fit.
Tom: Alright, so it looks like you're about halfway through.
Lyn: That's right.
We've already put together one side of the frame, so now we've flipped it over, and we need to put in the side jamb and the rest of the slats.
And then we'll be ready to set it into place.
Tom: Alright.
Looks pretty good.
Why don't I give you a hand?
Lyn: That'd be great.
Tom: Alright.
Let's get this all screwed together here.
♪♪ Alright, so now we got to hold it in position, and they have these little corner brackets so it doesn't move.
Now we want to fasten the cross slats in.
So, now we'll stand it up and slide it in the opening.
We'll see if the track is level first.
There you go.
Right on the button.
♪♪ Good.
♪♪ This is actually ready for the wall board, but let's put the rollers in and just see how they work.
Oh, these are nice and heavy.
We got one roller in here.
Another roller in.
And let's have that 2x6.
We have a 2x6 we put the brackets on.
These 2x6 right here have these brackets that you mount the wheels to, and they snap in like that.
And they'll lock in.
And pull them out so I can do that.
So, put it in the track.
So, if I had to take the door off, I could reach up in between the top of the door and the bottom of the track, snap that down, and pull the door out.
Alright, so now this 2x6 that we put the brackets that go on the top of the door, will represent the door.
I'll line it up with the bracket.
Alright.
Let's see how it slides.
Oh, that's nice.
Nice and quiet.
So, that two-by is a pretty short door, so... [ Both chuckle ] But it represents the door, and you can see how it's going to work.
Lyn: Thanks, Tommy.
Kevin: You can't see that dormer from the front, but out back, it adds so much more living space.
Richard: And it helped us hide some ductwork, too.
That was great.
Kevin: Oh, here they are.
Richard: Lookit.
Kevin: So, do you guys like the new layout inside now that everything's framed?
Tom: I think it looks great.
Jenn: Coming along.
Kevin: And the roof's almost done, too.
Richard: We haven't seen much of you, stranger.
Where you been?
You didn't do much work here.
Jenn: Well, I had a little fun last night.
Met my new best friend, uh, Trisha.
She's fantastic.
Yes.
So, but I do promise to get back to work here.
Richard: Alright.
Jenn: It's a little bit early, a little premature to get working on the landscape, but I am working on a design -- promise.
Kevin: Okay, Ms. Nashville.
What else we got going on?
Richard: Actually, we're gonna get the HVAC ductwork finished, so that'll mean plumbing and mechanical will be all roughed in.
Tom: Electricians are showing up.
They're gonna start the rough wiring.
Kevin: Very good.
So, a lot of work behind us, but a lot still to go.
All that coming up next time.
Till then, I'm Kevin O'Connor.
Tom: I'm Tom Silva.
Richard: I'm Richard Trethewey.
Jenn: I'm Jenn Nawada.
Kevin: ...for "This Old House" here in East Nashville, Tennessee.
Kevin: Next time on "This Old House..." When it comes to siding your house, there are more choices than ever.
And you'll never guess what this is made of.
We'll show you how it's made and we'll put it up on the house.
And some familiar faces have flown south to help renovate this historic 1920s brick cottage.
Mark: Let's step on it, Charlie!
Charlie: Country music, barbecue, and warm weather -- what's not to like?
♪♪


Support for PBS provided by:
Funding for THIS OLD HOUSE is provided by The Home Depot and Renewal By Andersen.