Harvest Table
Season 18 Episode 1810 | 26m 46sVideo has Closed Captions
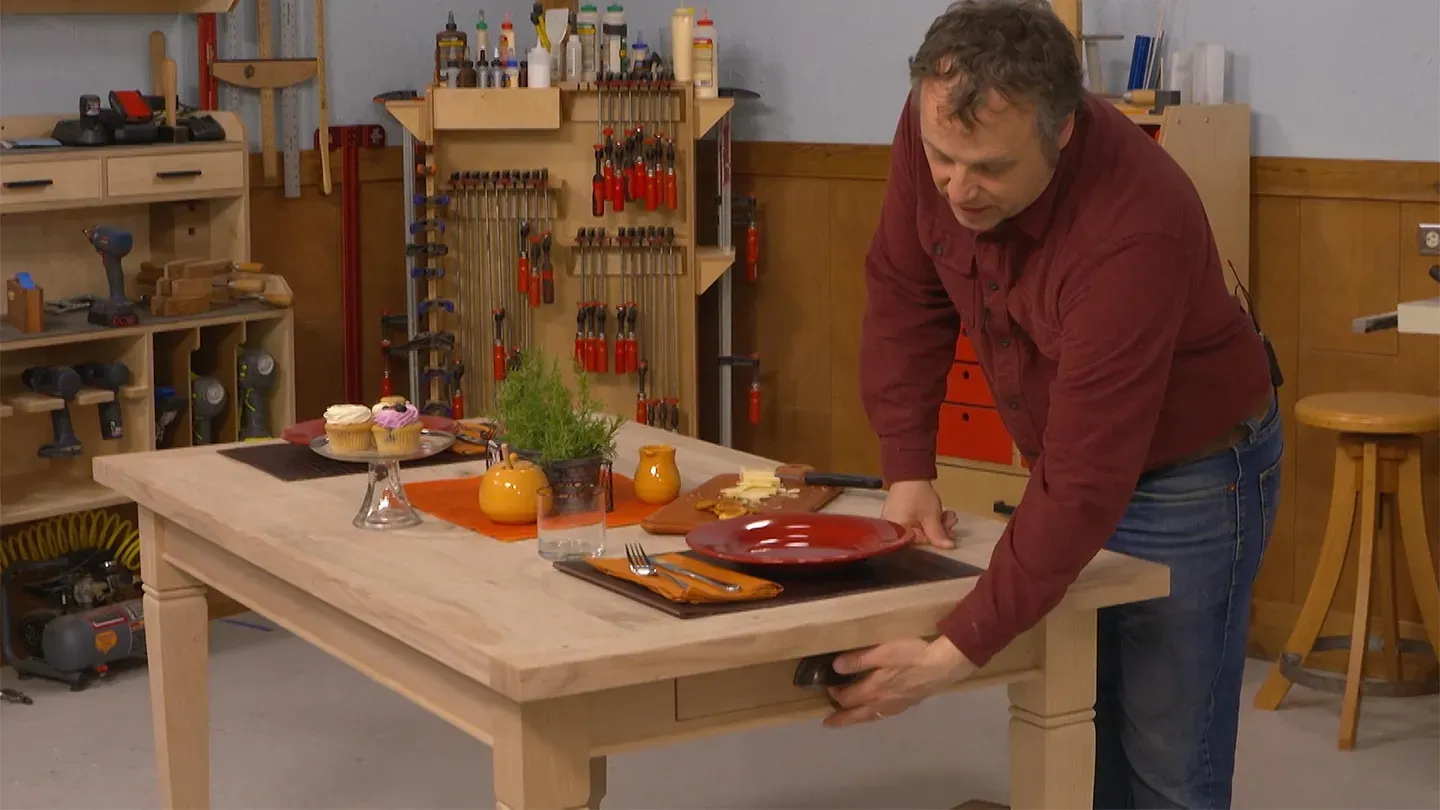
Logan, Chris, and Phil create a table that can handle anything a family can dish out.
Dining tables are made for everyday events. In this episode, Logan, Chris, and Phil create a table that can handle anything a family can dish out. With a solid oak top with breadboard ends and a simple to make base, you’re sure to learn new woodworking skills.
Problems playing video? | Closed Captioning Feedback
Problems playing video? | Closed Captioning Feedback
Woodsmith Shop is a local public television program presented by Iowa PBS
Harvest Table
Season 18 Episode 1810 | 26m 46sVideo has Closed Captions
Dining tables are made for everyday events. In this episode, Logan, Chris, and Phil create a table that can handle anything a family can dish out. With a solid oak top with breadboard ends and a simple to make base, you’re sure to learn new woodworking skills.
Problems playing video? | Closed Captioning Feedback
How to Watch Woodsmith Shop
Woodsmith Shop is available to stream on pbs.org and the free PBS App, available on iPhone, Apple TV, Android TV, Android smartphones, Amazon Fire TV, Amazon Fire Tablet, Roku, Samsung Smart TV, and Vizio.
Providing Support for PBS.org
Learn Moreabout PBS online sponsorship[ Power saw whirring ] [ Mid-tempo music plays ] Welcome back to "The Woodsmith Shop."
You know, a lot of the projects that we build as woodworkers, we fill with memories and special occasions.
And that's just what's happening on today's project.
We're building a harvest table, perfect for those family gatherings and special dinners.
And this one has a lot of really cool woodworking techniques involved with it.
We'll start here at the top.
It's got a really thick oak top.
We're making it with breadboard ends that are pinned in place with dowels.
The base is a sturdy construction that allows you to customize the look of the legs.
I'll show you a way to do it with some hand carving techniques.
Logan's gonna show a version of making the legs on the lathe.
The base also features a storage drawer at each end.
Kind of a fun, little surprise to it, and a great place to keep some of your table essentials.
If you're ready to build along with us the plans for this farmhouse table are at our website, WoodsmithShop.com.
Announcer: Major funding for "The Woodsmith Shop" has been provided by... Old Masters -- offering wood stains and finishes for the woodworking enthusiast and professional.
And by... Kreg -- from the first cut to the final assembly, providing woodworkers with products that help to simplify woodworking challenges.
Kreg.
Additional funding provided by... ♪♪ Titebond Wood Glues -- the pro's advantage.
♪♪ And by...
Here at Grizzly, woodworking isn't just our business, it's our passion.
We love what we do.
Thank you for the opportunity to support "Woodsmith Shop" TV.
♪♪ ♪♪ ♪♪ ♪♪ Let's be honest, when you're looking at a table, especially a dining room table, there's really only two things that you're gonna notice, the top and the legs.
The rest of it is just sort of filler.
Now, Chris is gonna handle the top of the table a little bit later on in the show.
Right now, I'm gonna focus on the base assembly.
And by that, I mean primarily the four legs that I'm working with here.
I've started the layout process on one of the legs here.
The main feature is a taper that runs on all four faces.
So I've marked out a line for where the taper begins, near the top of the leg, and then at some tick marks down at the end, where it will end.
So, then I can just take a straight edge, line those two marks up, and pencil those in.
There are a couple of other marks here that go on all four faces.
And that's where we're gonna cut a bead detail.
But we're gonna do that largely by hand.
And then another detail that we need to do is to relieve the top corner of the legs in order to be able to accept some hardware that we're gonna use that will bring the whole base assembly together.
There are some details on the legs that are just easier to do while the leg blanks are still in their square shape.
For example, at the router table, I cut a pair of stopped open ended mortises with a straight bit.
Again, with the leg just laying flat on the router table makes that really easy.
Then over at the table saw, made a couple of shallow kerfs all the way around the legs.
We'll shape those into a bead in a little bit here.
But the last thing that we want to do while the leg is still square is to remove this corner piece that I talked about earlier.
Now, the trick to that is holding the leg at a specific angle for that cut to be accurate.
So what I have is a V-block that I've made and attached to the bandsaw rip fence.
So that way, the leg is positioned at a perfect 45 degrees, and I can just slice straight down until I get to my stop line, and then I'll remove the rest of that material later with a handsaw.
This is the time that we've been waiting for.
It's time to turn these square blanks into something a little bit more shapely.
What I'm gonna do is cut the taper on two of the edges here.
But when I do that, I lose my reference line to be able to cut the tapers on the adjacent faces.
So what I'm gonna do is take the waste pieces that I have just cut off, and I'll use some masking tape and tape them back in place so that I have those lines to follow while I cut the other two tapers.
Stepping away from the bandsaw gives us an opportunity to exercise some hand skills, to give our legs a little bit of shape.
And it's a lot of fun, too.
What I did first is to use a handsaw and cut down the shoulder of the notch that we created with the V-block, so that reveals that corner cutout.
You'll see how that gets used in a little bit.
From there, then, it's time to grab a hand plane and clean up the blade marks left by the bandsaw.
There's usually a little ridge where the blade comes out of the cut, so that's where I focused my attention first, making a series of short passes right there to smooth out that transition.
From there, I'll make steadily longer passes coming down the full length of the leg, creating a smooth, even taper.
Now, you'll remember those two saw cuts that we made.
Now, I shaped those with a chisel into a rounded bead profile.
So, I made basically a 45-degree chamfer, and then altered the angle of the chisel to kind of round it over a little bit more to give you that bead effect.
And I think it turns out really nicely.
At the top, I separated it with just a simple chamfer, but at the corners I used a larger chamfer that I shaped with the chisel.
Now, when turning, it's called a pommel.
We'll see if Logan remembers that later on.
So what's next?
Well, what we want to do is to focus our attention now at the bottom of the leg.
So we have a template here that lines up with one leg, one edge of the leg, and the end that I can shape.
And we'll create a little bit of a, let's call it a cuff, all the way around on all four faces.
And then we'll shape a smaller secondary taper down here to form the foot on the leg.
We can set the legs aside for now that they're done, and focus on the ways that those legs are connected.
Those are the aprons.
There's two long aprons that are pretty plain, and then the two end aprons hold a surprise.
There's a couple of drawers in this table that add some bonus storage.
So to create the openings for the drawers, what we've done is we're starting with an extra wide blank cut to its correct size.
Over at the table saw, I ripped off a narrow strip to form the top of that apron.
Then I reset the rip fence and cut out a wider strip that will form the opening, and you'll form the opening by grabbing a miter gauge and cross-cutting out a section from each end of your blank.
So, now, what we have here are four pieces that, when we re-glue them together, will form our apron, but with a perfectly sized opening for where that drawer is gonna be.
If you're gonna go with a clear finish or a stain, the nice thing is, is that we can use the piece left over from the middle as a grain-matching drawer front down the road.
So, what I need to do now is apply some glue to these blocks and then clamp them together.
Then we'll rip this to its final width.
It's time to focus on some hardware now.
What I've done is use just a regular table saw blade and cut a kerf near the top edge of all of my apron pieces.
That's gonna hold what's called a tabletop fastener, sometimes called a Z-clip 'cause of the shape.
And we'll be able to drive a screw in to connect the top to the aprons and make a secure connection.
Okay, here's what we've been working for this whole time, is the fully assembled base.
Now, you can see some of the things that we were working on before, where I cut the dadoes in the end aprons and also in this middle divider piece that hold these long runners or guides for the drawers that we'll be adding in just a little bit.
So they're glued in place.
And then you could see also that this divider piece is glued into a wider dado that gets cut on the center of the long apron pieces.
At the corners where the legs join, you can see how this corner bracket now works, where the two ends fit into those kerfs, and then the hanger bolt, which has wood screw threads on one end, gets threaded into the leg.
The machine screw that sticks out here receives a nut that you tighten down and locks everything together.
So what we end up with is a pretty lightweight, but strong assembly that's ready for the top.
But before I turn this over to Chris, what I want to do now is that we've defined this opening on each end for the drawers is to head over to the table saw and create a strong but simple drawer construction.
You know, one of my favorite drawer joinery methods is one of the simplest.
It's a rabbet joint.
And what I'm gonna do is cut a pretty wide and deep rabbet on each end of the draw fronts.
That's gonna anchor and register the drawer sides.
Once it's all glued up, we'll come back and reinforce that.
You can do that with either nails or dowels or something like that, and it adds a little visual punctuation to the drawer itself.
So, I've set up a dado blade, and I'm using the rip fence here to control the width of that dado.
I'm gonna guide the piece with the miter gauge while I cut a rabbet on each end of the drawer fronts.
Once that's taken care of, the next step is to keep the dado blade here, and then I'm gonna move the rip fence out of the way and adjust a stop on my miter gauge and cut a dado on the inside edge of the drawer sides.
You'll notice that this dado isn't at the end, it's more in the middle.
What this means is that I can still open the drawer and get access to the entire inside of the drawer, but without having to use full extension hardware, since the end of the drawer will be kind of pulled in a little bit.
The final step is to cut a groove on the inside edge of the sides and the front to hold the drawer bottom.
It's down to the last little bits and pieces on the inside of the base here.
Let's take a little survey.
I added corner blocks to reinforce the dado joinery.
It makes the whole base a little bit more rigid.
Now, inside the drawer compartment, I added thin strips down below, drawer runners, and then another matching set of strips on top, kickers, that keep the drawer from tipping as you pull it out.
Now, the last thing to do is to rout some bead molding and then glue that to the underside of the aprons and stretchers all the way around.
Gives it a nice country look.
And with that, you can see, then, how the drawer is gonna go in place, which I glued up with a plywood drawer bottom.
You also get an idea here of how the back is inset from the end of the drawer.
This way, you can see you get full access to the drawer, and it's not really drooping and falling out of its opening.
♪♪ Well, it's time to start on the top for our farmhouse table.
And for this top, we're gonna use locally sourced pin oak.
Came from right here in Des Moines, Iowa.
Got a little sample of it here.
You can see it.
This is how it's come to us from the mill.
You can see the bandsaw cuts in it.
A little dirt, a little rough looking.
But that's okay.
Here's a piece that we've cleaned up.
We've jointed all four sides, run it through the table saw.
And it is a pretty, pretty piece of red oak.
Our top is gonna have a nice, casual look with the different grains.
And it is going to be substantial.
You can have a good family fight at this table, and the table is gonna come out fine.
Now, to start with, I am going to put a spline to connect each of our different planks together.
And that's gonna help me with the alignment during the glue up.
So I have a 1/4-inch slotting bit in my router.
It's gonna go 1/2 an inch deep.
And that's my task.
I'm gonna go ahead and slot the inside edges of each of these planks.
Well, it's time to glue things up.
I finished slotting all of these different boards for the top, and I made a spline out of some plywood to fit in all of those grooves.
So, what now?
Well, I'm gonna go ahead and spread an awful lot of glue here.
I'm gonna go ahead and put plenty of glue down in slot.
I probably won't put any glue on the spline itself, 'cause, you know, that's more of an alignment tool than a strength tool.
We've got a lot of glue area here, so I'm not worried about a lack of strength in our glue-up.
I'll get all that together, put a lot of clamps on here, and we'll have a good solid slab of pin oak for our tabletop.
Our table receives two breadboard ends, and here's one of them.
Now, each breadboard end needs to have an 1 1/4-inch-deep mortise run.
Not the full length, but about 1 1/2 inches in from each end.
And that'll slip over a tenon which is formed on our tabletop.
So I've got a 3/8-inch bit in my router table, and I'm gonna make about four or five passes to achieve that depth.
It's just way too deep to go in all at one pass.
I also have two pencil lines on my fence, and that gives me an indication of where I can start my cut, because I'm gonna have to drop down on the bit.
I'll push the blank all the way until I find my next pencil mark, and then lift up on it, because, as I mentioned, that mortise does not go out the ends.
It's inset 1 1/2 inches.
Well, our tabletop is out of the clamps, and I've cleaned it up a little bit.
Now what I want to do is prepare the ends of our tabletop for our breadboard ends.
The first step is that I'm going to trim the ends using this track saw, and that'll get us a final length.
Then I'm gonna take a router with a fence and a straight bit, and I need to form a long tenon on each end to fit into this slot.
Once we get that done, it'll be time for a little glue, a few dowels.
Well, after routing the tenons on the end of our tabletop, the next thing I did was took a saw, and I went ahead and cut shoulders to shorten the length of the tenons so they would fit in our mortise.
Now, one of the issues that we really have to think about with a tabletop with breadboard ends is wood movement.
The grain direction is perpendicular to each other.
So there is a strategy here.
What I'm going to do is only glue about the center 6 to 7 inches.
The rest of the breadboard end is gonna float.
To make sure it stays secure, I've drilled some holes for dowels.
These two dowels will go into holes the same diameter as the dowel itself, but the outer holes, you can see, I've made longer to allow the dowel to float and to move in and out with the expansion and contraction of our top, and that's how we're gonna have breadboard ends.
They're gonna stay solidly attached and not cause cracks within the tabletop.
So let's start by going ahead and gluing -- applying a little glue to that center 6 to 7 inches.
I'm gonna go ahead and put a little glue inside my mortise here, as well.
[ Mid-tempo music plays ] ♪♪ ♪♪ All right.
Now I'm gonna go ahead and drive my dowels in.
♪♪ And just 'cause we've got a super-long clamp here, I'm gonna go ahead and put it right on the center where the glue is, and pinch that breadboard tight until the glue dries.
So, I'm gonna show you how we can take an older blank like this and turn legs.
And using a lathe, you can come up with whatever shape you want.
So now what I'm gonna do is grab my blank.
And I've already crossed the corners to mark my center.
With a faceplate like this, I like to wiggle it around until each of my screw holes are lined up over those cross lines, and that's gonna tell me that it's centered.
And then, after we get it chalked up, we'll see how true it's running, and we'll go and start turning it round.
All right.
So, once this thing's held in here, we want to see how it's spinning.
And it looks like it's running pretty true, which means my marks were accurate and this blank is pretty straight.
So, now, we got to decide really how we're going to approach this.
So, we need to leave some form of square face at the minimum up here to mount into those aprons.
What's easier and what is commonly seen is that, a lot of the times, just the top section of the leg is gonna be left completely square, and then the bottom, you know, two-thirds or three-quarters will be turned, and I think that's what we'll do.
That leaves us square references up top for mortises, but then we can shape the bottom of the leg however we want.
So, I'm just gonna grab a marker or a pencil, and I'm going to strike a line all around.
This doesn't have to be super accurate.
We are going to define this with a tool in a little bit.
But what this does is it's gonna create a solid line that I will be able to see as this blank is turning, and I'll know to stay away from that.
So what tools are we gonna use?
Well, the first thing I'm going to use is gonna be a spindle roughing gouge.
This gouge is designed to take a square blank like this and turn it round by knocking off the corners.
So I'll use this for the bulk of the removal.
Then, to cut in some of the details, I'm probably gonna flop over to a parting tool here, which is gonna make good, clean, square, defining cuts, as well as a spindle gouge.
And then, for some of the final cuts, and maybe some of the final shaping as well, I'm gonna go over here to a skew chisel.
And this skew chisel, much like a hand plane, is gonna give us a really nice planing cut across the surface, and it's gonna leave a surface that doesn't need a whole lot of sandpaper.
So, our first step here is going to be to knock these corners off and get this at least fairly round from that line down.
So what I'm gonna do is position my tool rest so that I'm cutting at the middle point of this, and I'm gonna make sure that I'm keeping it parallel to our spindle blank.
That's gonna allow me to keep a straight cut all the way across.
Okay.
At this point, I have this turned round for the most part.
About half of it's round down here.
And then it gradually goes up into these facets up top, where it transitions.
And I like this kind of 45-degree-angle transition from the square top to the rounded base.
So I think we're gonna stick with that, and I'll bring that up to those lines.
Now we have to figure out what design we want.
And the biggest thing with picking a design for a turned leg is we want it to look good, but we also want it to be reproducible.
We want to make four legs that match.
So what I think we'll do here is I'm gonna pull these transitions up a little bit higher.
But then, I ,think in this area, we'll start with a ball.
It's not gonna be perfectly round, obviously, but we'll make a ball here, and then we'll just transition into a nice, gradual taper.
It's kind of that classic country house- or farmhouse-style leg.
So we'll go ahead and start by getting this the rest of the way round because I want to measure that diameter.
Then I'm gonna transfer that diameter into a length here.
That way, it gives us an idea of what true round would be if we were gonna create an entire ball out of this, and then I'm gonna use the spindle gouge to start rounding that over.
All the ball is gonna be is a simple bead.
It's gonna be a bead that meets on the top of the ball and rounds over on each side.
Now, I have this ball to where I want it.
And as you can see, it's not perfectly circle.
It actually looks like an onion.
And that's what some people in the turning community call these, are onions, where it's pretty much round, but tapers and flares up at the top.
Now, I like the transition here, with that 45 degree down.
We have a shoulder, and then it rolls into that ball.
So what we're gonna do now is clean up this lower shoulder.
But we're gonna turn our attention here.
And this guy is just gonna be a 45-degree cut, more or less, in to clean up some of this tear out.
And then we'll form some form of transition in here, like we did up top.
After that's done, then comes taking care of this lower half.
And all this is gonna be is a taper.
We'll taper from the maximum diameter here down to whatever our minimum diameter is down here.
And that's gonna be where our foot is.
So I'll mark that with a parting tool to give me an aiming point.
And then it's just a matter of hogging that material away and smoothing it out with the skew chisel until it's a nice, smooth transition.
Then we can start sanding it.
Now, I changed my mind about halfway through doing this taper, and I decided I kind of wanted to add some form of detail down here, so I just added a little sock for this thing, which is just a slight curve out, step up in diameter, and then it tapers back down.
And it's just a nice, little detail I think is gonna look really nice.
And I measured it at 4 inches so I can replicate that on each of the four legs.
So, now, at this point, I've went ahead and turned this down.
I have some vibration marks.
And that's one of the big things when you're turning legs, like, for a table or for chairs, is to listen for what the wood is telling you.
Sometimes you can hear some harmonic vibration in this thing, and that's because this spindle, even though it's fairly thick, it is flexing a little bit.
And when that happens, I just take a little bit lighter cut, back off the pressure, and that will alleviate a lot of that.
I have a little bit of spiraling here still, so I'll make one more pass with the skew chisel.
Just floating that bevel with very little pressure should give us a really clean surface.
Then it's on to sanding, and then it's on to turning three more of these.
♪♪ It was really a lot of fun making this table on the show today, and I really enjoyed making the legs and adding those custom details to it.
But I think the best part of making a table like this is what happens afterwards.
It's gonna gather its fair share of marks and teeth marks and homework scribbles and spilled nail polish remover, and all of that.
And it just adds to the value and importance of a project, like a dining table like this.
If you're ready to make one for yourself and start building some memories along with the table, the plans are at our website, WoodsmithShop.com.
That's also the place to find a lot more great project ideas and plans, videos to help you become a better woodworker, and ways to keep yourself busy in the shop until we can come right back here for another episode and another great project in the Woodsmith Shop.
♪♪ ♪♪ ♪♪ ♪♪ If you'd like to get more video tips and techniques, sign up for the free weekly Woodsmith eTip.
Every week, you'll receive an e-mail with a video tip to get more out of your table saw, router table, and more.
Sign up at WoodsmithShop.com.
Everything in today's show comes from the newly expanded Woodsmith Guild Edition with shop projects, plans, tips, and techniques.
To get a free preview issue of the Woodsmith Guild Edition and a free Woodsmith book, go to WoodsmithShop.com.
In addition, past seasons of "The Woodsmith Shop" are available on DVD, or you can watch them online from your computer, tablet, or mobile device.
For more information, go to WoodsmithShop.com.
Announcer: Major funding for "The Woodsmith Shop" has been provided by... Old Masters -- offering wood stains and finishes for the woodworking enthusiast and professional.
And by... Kreg -- from the first cut to the final assembly, providing woodworkers with products that help to simplify woodworking challenges.
Kreg.
Additional funding provided by... ♪♪ Titebond Wood Glues -- the pro's advantage.
♪♪ And by...
Here at Grizzly, woodworking isn't just our business, it's our passion.
We love what we do.
Thank you for the opportunity to support "Woodsmith Shop" TV.


Support for PBS provided by:
Woodsmith Shop is a local public television program presented by Iowa PBS