Outdoor Entertaining
Season 18 Episode 1809 | 26m 46sVideo has Closed Captions
Step up your outdoor entertaining with a serving station to go with your grill.
Step up your outdoor entertaining with a serving station to go with your grill. This easy-to-build project features durable outdoor materials. It offers a prep area and a bar height counter for serving. We top it with custom concrete counters.
Problems playing video? | Closed Captioning Feedback
Problems playing video? | Closed Captioning Feedback
Woodsmith Shop is a local public television program presented by Iowa PBS
Outdoor Entertaining
Season 18 Episode 1809 | 26m 46sVideo has Closed Captions
Step up your outdoor entertaining with a serving station to go with your grill. This easy-to-build project features durable outdoor materials. It offers a prep area and a bar height counter for serving. We top it with custom concrete counters.
Problems playing video? | Closed Captioning Feedback
How to Watch Woodsmith Shop
Woodsmith Shop is available to stream on pbs.org and the free PBS App, available on iPhone, Apple TV, Android TV, Android smartphones, Amazon Fire TV, Amazon Fire Tablet, Roku, Samsung Smart TV, and Vizio.
Providing Support for PBS.org
Learn Moreabout PBS online sponsorship[ Power saw whirring ] [ Mid-tempo music plays ] Welcome back for another great project here on the Woodsmith Shop.
You know, you can enjoy a meal outside with nothing more than a picnic table and a grill, but you can add even more friends and family if you have the right equipment to go with it.
And that's what we're doing on today's show.
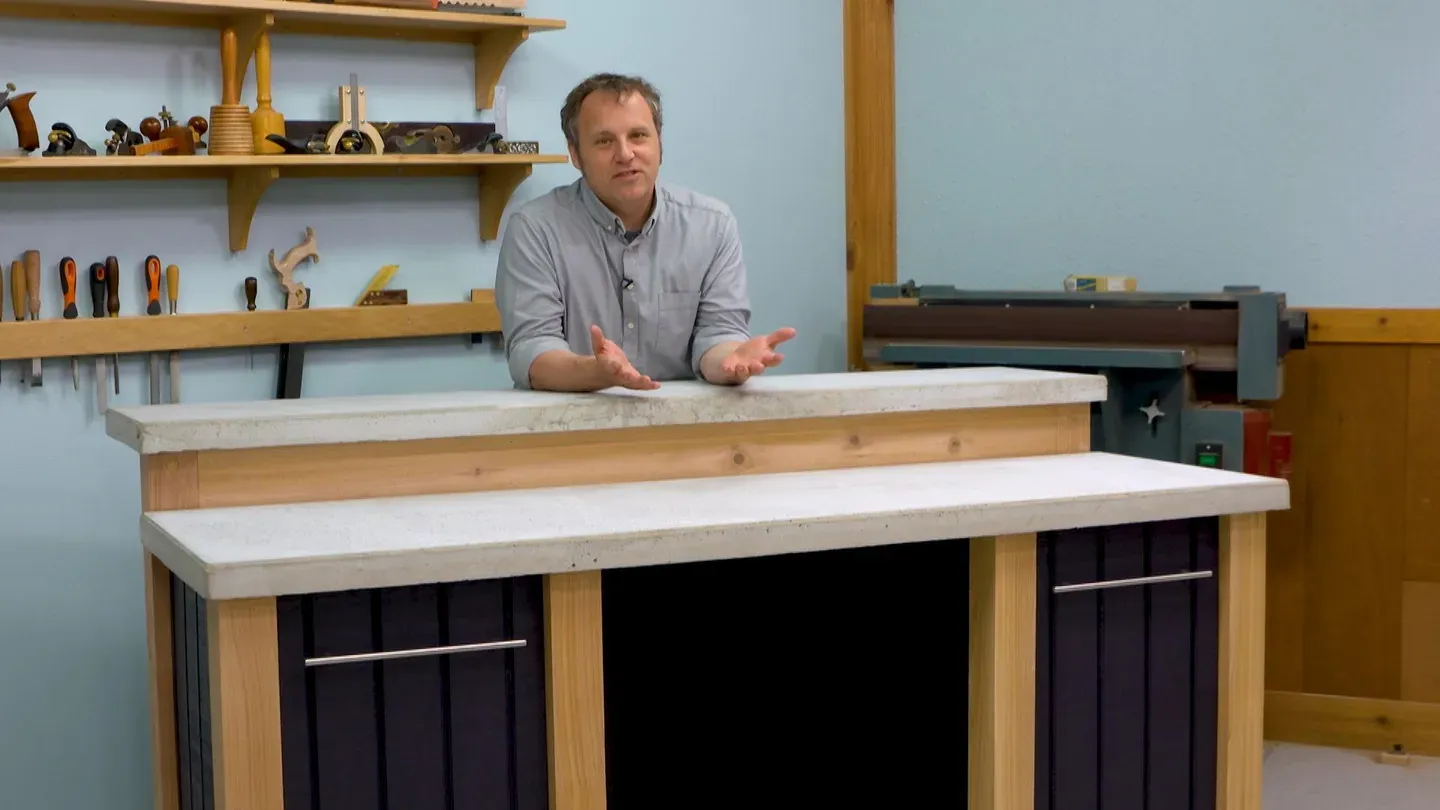
We're gonna build this outdoor entertainment center, we're calling it, and it features a really wide and long prep surface.
So now you have a place to set out all your gear and the food, and it's not gonna get in the way.
There's even a raised countertop in the back here for entertaining guests while you're preparing.
And then down below, don't forget the need for storage.
There are two enclosed cabinets behind doors here, and then a middle one where you can tuck an outdoor refrigerator maybe, or a cooler with some drinks in it, and you'll be ready for your next get-together.
The construction on this is pretty simple, as you'll see.
We're gonna use a lot of long metal fasteners and pocket screws to get this put together.
If you're ready to upgrade your deck, the plans are at our website -- WoodsmithShop.com.
For right now, though, it's time to build.
Announcer: Major funding for "The Woodsmith Shop" has been provided by... Old Masters -- offering wood stains and finishes for the woodworking enthusiast and professional.
And by... Kreg -- from the first cut to the final assembly, providing woodworkers with products that help to simplify woodworking challenges.
Kreg.
Additional funding provided by... ...Titebond Wood Glues -- the pro's advantage.
And by...
Here at Grizzly, woodworking isn't just our business, it's our passion.
We love what we do.
Thank you for the opportunity to support "Woodsmith Shop" TV.
♪♪ ♪♪ ♪♪ ♪♪ Huber: Miter saw is a great tool for building a project like this, but you want to get it set up into a good cutting station.
I have a stack of parts that I need to cut, and then an open area to keep my parts organized after I've finished cutting them.
You'll see that the cart that I have the miter saw attached to has extended wings to be able to support long parts.
And then when I need to make a lot of parts that are exactly the same length, I'm gonna clamp a stop in place on the fence.
Here I'm just using a wooden hand screw.
It's really easy to attach to the fence, and I can position it really quickly, so I'll cut all of the leg posts that I need for this project to their final length.
Make sure you have all the parts that you need.
Then I'll reposition the stop block in order to cut the taller back legs.
These are gonna support the countertop later on.
4x4 pieces work great for some of the really sturdy pieces that we need in this project, but there are some pieces that need to be just a little bit smaller.
For that, I'm just gonna go over to the bandsaw and make a few cuts to resaw those into slightly narrower parts.
I kind of think of the bandsaw as a little bit of a lumber mill, where you can take bigger pieces and turn them into the smaller parts that you need, without having to glue up pieces later on.
Well, here's the skeleton of our entertainment center all put together.
Now, I started by assembling the two end pieces here, using those big, long timber connecting screws.
After driving those in place, then the smaller supports can get put in with the pocket screws.
Then to connect the long ones, I put the lower beam in and then had a long clamp that I was able to pull everything together with in order to drive those screws in.
And then the upper rail and then the back splash panel as well.
Those just go in with pocket screws.
Make sure when you're attaching these inner supports that they're square so you have a nice uniform-size opening.
So what's left now?
Well, now I'm gonna turn this over to Chris, and he's gonna fill out the skeleton with some of the panels and doors that are gonna go in here.
And then we'll wrap things up with a countertop.
With the frame of our outdoor entertainment center all done, it's time to think about cladding it.
What we want to do is put a nice skin on the outside and also to define the interior spaces.
Now, to do that, I've added some 2x2s.
There's a 2x2 along this back edge.
I've got two pieces to support a bottom on each of these end compartments, and I've added a piece here on this rail which will help support our side.
Now, the sides and the back are made out of T1-11, which is a fantastic outdoor material for this project.
One thing I've done to be a little bit careful is that I've made sure to center the grooves so that the panel is symmetric, and so equal distances both sides.
Now, to attach all these panels I'm going to apply some exterior-grade adhesive here and here.
Now mastic would be great.
I've also got some of this good type III exterior glue, and that's what I'm gonna use.
And get it on before it drips.
There we go.
And then I'm gonna reinforce it with a few nails.
So I've added these two panels which define the space for a refrigerator and define the storage areas on either end of our project.
Now, I've also added a bottom to each area, and my 2x2 cleating was already in place for that, so that was easy.
I did have to do a little notching, though.
I then next added some cleating for a small shelf.
Once again I had to do a little bit of notching.
Pretty easy, though.
So we've got our structure in place, we've got it skinned.
It's all defined.
I think we're ready to think about a countertop and details now.
So our outdoor entertainment center needs some form of top on it.
Now, in the plans, we show that being a tile top, and that works great.
But you have a bunch of different options here.
You could do a hardwood top, something like cedar, and that would look great, but it would need regular maintenance.
Or you could do something like a synthetic decking or maybe even a marble countertop.
But what I'm gonna do today is a little bit different.
We're gonna do a poured-concrete countertop.
It's kind of a fun technique and it's gonna last really well outside.
So to do our concrete countertop we need to start with a form.
So I have this piece of laminate-covered particleboard that we're gonna make a form out of.
So the first thing I'm gonna do is cut it down to a rough size.
Then we're head over to the table saw.
What I'll do there is cut strips that's gonna form the edges of the form.
And then I'll cut the bottom of the form.
All right.
So that completes the basic form on this.
Now as I said, we're pouring this as a rectangular countertop.
But if you were gonna plan on doing something like a sink, you could include that in the form.
So you're not pouring that area and have to cut it out later.
So at this point, I have everything screwed together, and I've screwed it about every 7 or 8 inches or so.
This doesn't have to be super tight, as if we were doing something like epoxy that could leak out.
The concrete has a lot of bulk there, so it's not gonna seep out necessarily.
But we do want to come back with some silicone caulk now and seal up the edges.
We want to avoid any of that moisture seeping out if we can.
Plus this is actually the surface that's gonna become the top.
So by caulking the edges and adding a small radius with our fingertip, or with the end of the caulk gun, we can go ahead and round over the corners of the concrete countertop.
Okay.
Once I get all the joints done, I'm gonna come back with a little glass of water and just stick my finger in there and smooth out these joints.
By doing this, I'm taking away any radius that's left on the top, and I'm actually creating a nice smooth what will end up being a roundover on the finished countertop.
Okay, with everything smoothed out, I'm gonna let this cure for 35, 40 minutes.
And in the meantime, I'll start mixing some concrete.
All right, so the concrete that we're gonna use for this countertop is a mix that is designed specifically for counters.
That means it has a polymer added so it's gonna float a little bit easier, and it is a little bit lighter weight.
So what I have here is a pair of buckets and my water.
Now we're gonna mix this based on the manufacturer's recommendations on it, which is about 16 cups per bag of concrete.
Now, I'm expecting this to take several bags, and I'm gonna mix this in smaller batches at a time, just kind of working it together till it starts to absorb the water.
Then I'll add a little bit more.
Now, it is important to make sure that this is really, really mixed well.
We don't want any dry spots in the finished countertop.
And as I am pouring this, we are gonna add a little bit of reinforcement into the slab.
What I'm gonna use are these pieces of fiberglass rebar.
Now, this is because this countertop is gonna be floating over a couple of cabinets.
Unlike a slab that you might have for your shed or for your driveway that's sitting on a bed of gravel, this has no support underneath it.
So we want to add a little bit of tensile strength with that rebar.
So once I get this thing about halfway filled up, I'm gonna embed that rebar into the concrete and then top it off.
♪♪ ♪♪ ♪♪ ♪♪ Okay.
So that's quite a bit of mixing.
And if you're doing a bunch of these, or even if you're doing these two, renting a little concrete mixer would really speed this process up.
But now that I have this all poured, the rebar is in there, now it's time just to let it set up.
And what I've done is it's been sitting here for about 30 minutes or so, and the excess moisture has started to rise to the surface.
And I've went ahead and taken a hardwood float and just floated over the top to kind of smooth it out.
Now, as I mentioned, the bottom side is what is planned to be the top.
But just in case once we flip it over there is a void or something like that on that bottom side, I have an option of keeping this super smooth and using this as a surface as well.
So as this firms up, it's easy to kind of just frost it like a cake.
Nice, smooth, light motions and you can get a really smooth surface.
Now, this is gonna cure for about 24 hours before we pop those forms off and see what we got.
Okay, we're kind of at a halfway point on our outdoor entertainment project here, and I kind of want to review exactly where we are to this point.
Logan got the main countertop poured, and concrete adds kind of a fun little element to this woodworking project.
And it's gonna be a nice outdoor surface.
Now, after allowing the concrete to cure for 24 hours, he came back and loosened the screws on the form that he made and then started peeling off the sides.
And then, with the help of John Doyle, our assistant here, he got the countertop flipped over, and you can see what our surface looks like.
We still have a little bit of moisture here from a piece that was setting on it, and there are a few little bubbles and holes there, but I think it adds a nice texture, and this is gonna be a really nice project for being outside.
The narrower section is just on the workbench over there.
There's a few things that we have to take care of, though.
If you're ready to build along with us, the plans for this center are at our website -- WoodsmithShop.com.
So what's next?
Well, what we want to do is attach the corbels that Chris made earlier to help support that other section of concrete.
They get screwed to this back piece here.
And then you'll notice there's a gap between the countertop and the back.
So we're gonna add a valance here as well, and I'm gonna show you how to take care of that.
And then up front, the two compartments that enclose all of our storage, I want to add some doors and hinges on that to just present a nice finished face for it.
And then there are a few other cleanup things, like plugging screw holes, and we'll get to the process for how to do all that and then wrap things up with some paint and finish.
So let's get started on attaching these corbels.
Now, even though there are four corbels, they're not all attached the same way.
I'm gonna get started with the ones that are mounted to the two end posts here.
What we're gonna do is drive a long lag screw through the post into the corbel from one direction.
Then on the other side, we'll come in through the corbel into the post with a shorter deck screw.
So our work starts by drilling a counterbore here to recess the head of the lag screw, and you'll do that with a Forstner bit in a hand drill and drive it in about an inch.
The Forstner bit leaves a little dimple, and you can use that as a guide for drilling the shank hole for the threads of the lag screw and go all the way through there.
What we'll have to do then is mark the location where the lag screw comes out, drill a pilot hole in the back side of the corbel, and then we can lock that in place.
Now, the middle two corbels have just a slight variation on how they're attached.
I'm gonna use a long connector screw that will go through this back apron and into the corbel.
And then just like the other ones, I'm gonna use a deck screw that goes through the corbel into the apron.
The process here is pretty simple.
I'm gonna drill a shallow counterbore for the head of that screw.
And because the screw has self-tapping threads, I can hold the corbel in place and then just drive it in.
The next item on our punch list is to fill in the space between the countertop and this rear apron, and we did that by adding a thick valance piece, I guess we'll call it.
And we made it out of the cedar so that it blends in with the rest of the project.
The big thing here is that we wanted the front edge to be flush with these back posts.
That way, when the countertop is up against it, we have a continuous surface running all the way down.
In order to do that, we added some spacers along the back and then, where necessary, slipped in a few shims too in order to get that smooth surface, we'll cut those flush in preparation for attaching and installing the countertop on this back portion here.
I have a piece here that's left over from cutting our post to length because I'm gonna use that to make the plugs that will cover the screw holes.
That way the plugs are gonna match.
I mean, you don't really need them to match.
You could use a contrasting material.
Then you're gonna draw attention to those plugs and they become accents, kind of punctuation marks on the project.
But in order to do that, we need to create those plugs that have a really snug fit.
So I have a pretty big plug cutter installed in the drill press, and that's the way to go here to be able to get the most control.
So I have a 3/4-inch plug cutter here installed in the drill press.
That's not one that you're typically gonna find, but they are pretty easy to get.
Now, what I've done is set up the drill press and a stop for the correct depth.
And I'm also using the fence here to help control the workpiece.
I'm gonna just create a row of plugs down one side.
Then I can flip the board around and create a row on the opposite edge.
And you want to cut way more than you need.
That way you can line up the grain a little bit easier, and there's probably gonna be a likelihood that one or two of them are gonna break at just the wrong place.
When I'm done, I'm gonna switch it out for a 3/8-inch plug cutter, much smaller, to be able to cover the screw holes that attach the corbels to the back of the project.
The usual next step here, after you've created a whole mess of plugs, is to grab a screwdriver and start prying them out.
However, especially on this soft cedar, the screwdriver can end up dinging up the sides of the plug, and that's gonna show up as a noticeable gap when you glue those plugs in place.
Instead, I've set up the bandsaw here to essentially just resaw them off.
Now the problem is, as you can imagine, with all of these plugs suddenly getting cut free, it's like a game of 52 pickup.
There's gonna be plugs all over the place.
So the solution is to grab a roll of masking tape.
Run a strip of it over the top of the plugs.
Now when I cut them free, they're gonna stick to the masking tape.
When I need to use them, I can just peel it up a little at a time, grab the plug, and glue it in place.
Now, installing the plugs is really a two-step operation.
The first thing that I'm gonna do is peel away the tape here and get a couple of plugs out.
Then I'm gonna use a glue brush to apply glue to the inside of the counterbore.
About the only thing that you have to watch out for here is making sure that the grain orientation on the plug and the workpiece are more or less the same.
Press it in as far as you can go.
If you need to, tap it in.
I'm gonna let that set up for a little bit and then come back and pare it flush with a chisel.
All right, I said that I was gonna be talking about the paint and finish here, but instead there are a couple of things that I need to take care of in order to get the doors wrapped up.
Now, we have some nice big openings here.
Seems like the doors are gonna be pretty straightforward.
However, a couple of things were nagging at me.
First off, the door is designed to stop against the bottom shelf here, and then a couple of stops that we put in on the side.
However, that bottom shelf is plywood, and those bare plywood edges are just kind of glaring right now.
Instead, what I want to do is just cut a thin strip of cedar that matches the rest of this, and I'm gonna run a bead of glue here.
Stick that in place.
I'll tack it in with some nails here and just kind of pretty it up a little bit.
The next thing, like I alluded to already, is to cut a pair of stops from our cedar pieces that we have and install those here.
Again, I'll just pin them in place with some glue and some brads as well.
That gets us ready for the door itself.
Now, the door...
Pretty straightforward.
It's a slab panel door, as they call it, made out of that same T1-11 that we've used on the rest of the project here and cut it to fit its opening, leaving a little bit of a gap there because this is gonna live outside.
Now, the one thing that you want to do when you're cutting this over at the table saw is pay attention to the arrangement of these panel details on the exterior face.
You'll notice that I cut it so that I have a symmetrical look on each side here.
So you're gonna have to watch that and measure your openings carefully when you make those cuts.
All right, we're getting the doors installed on our grilling center here.
And one of the things is that since this is gonna be outside, we really want these doors locked down so that they're gonna operate smoothly over its entire life.
So the ones that we're using, you can see down here are pretty interesting.
They have a wraparound design.
Where it attaches to the grilling center, it attaches right to those stops.
You can actually add another screw on the inside.
And then you can also see how the door part cradles the door from underneath.
Same thing's going on up at the top of the door for the upper hinge.
And what that means is now that the door is pinched in place, so there's no sag or droop in the hinge mechanism and it's gonna operate smoothly.
Next thing that we need to do is install the pull on the front of the door.
The big thing here is that we want the pull, especially since it's so wide, to make sure that it's nice and level on the front, and then also located top to bottom and side to side centered.
My solution for doing that is to use a drilling guide like this.
All I need to do for the door for layout is to mark a center line on the top of the door.
There's a movable fence and a notch on there, so I can just line it up with the center line here, and this fence will control how far up and down the pull gets located.
Can set that really easily.
All right, there you go.
After cinching down the screws with a screwdriver, you can see it's installed in the correct position, centered side to side and at the correct height here.
Bar pulls like this are great on a project like that 'cause it's as great as a towel rack for use in meal prep as you're going along here.
One of the best parts of building a woodworking project like the outdoor entertainment center that we did in today's episode is how easily you can take the plans and customize them to suit your specific need.
Now, for example, this center is gonna go live over at Logan's place, so he got to choose the paint color, and that's why we decided to go with the concrete countertops.
The whole point of it is that not only do you get to build something that you're gonna use and enjoy for years to come, but you're gonna make it uniquely your own if you're ready to build along, the plans are at our website -- WoodsmithShop.com.
There you'll also find plans for other great woodworking projects that we featured on the show, videos to help you become a better woodworker and to gain the confidence you need to build the projects that are gonna turn out great.
And then we'll join right back here for another great project in the Woodsmith Shop.
♪♪ ♪♪ ♪♪ If you'd like to get more video tips and techniques, sign up for the free weekly Woodsmith eTip.
Every week, you'll receive an e-mail with a video tip to get more out of your table saw, router table, and more.
Sign up at WoodsmithShop.com.
Everything in today's show comes from the newly expanded Woodsmith Guild Edition with shop projects, plans, tips, and techniques.
To get a free preview issue of the Woodsmith Guild Edition and a free Woodsmith book, go to WoodsmithShop.com.
In addition, past seasons of "The Woodsmith Shop" are available on DVD, or you can watch them online from your computer, tablet, or mobile device.
For more information, go to WoodsmithShop.com.
Announcer: Major funding for "The Woodsmith Shop" has been provided by... Old Masters -- offering wood stains and finishes for the woodworking enthusiast and professional.
And by... Kreg -- from the first cut to the final assembly, providing woodworkers with products that help to simplify woodworking challenges.
Kreg.
Additional funding provided by... ...Titebond Wood Glues -- the pro's advantage.
And by...
Here at Grizzly, woodworking isn't just our business, it's our passion.
We love what we do.
Thank you for the opportunity to support "Woodsmith Shop" TV.


Support for PBS provided by:
Woodsmith Shop is a local public television program presented by Iowa PBS