Seating for Two
Season 18 Episode 1802 | 26m 45sVideo has Closed Captions
In this episode the team tackles two simple seating options.
In this episode the team tackles two simple seating options. Logan makes a stool with bamboo-inspired turned legs. Chris returns to one of his first projects as a Woodsmith designer: a folding outdoor bench. Both are weekend projects you’ll enjoy.
Problems playing video? | Closed Captioning Feedback
Problems playing video? | Closed Captioning Feedback
Woodsmith Shop is a local public television program presented by Iowa PBS
Seating for Two
Season 18 Episode 1802 | 26m 45sVideo has Closed Captions
In this episode the team tackles two simple seating options. Logan makes a stool with bamboo-inspired turned legs. Chris returns to one of his first projects as a Woodsmith designer: a folding outdoor bench. Both are weekend projects you’ll enjoy.
Problems playing video? | Closed Captioning Feedback
How to Watch Woodsmith Shop
Woodsmith Shop is available to stream on pbs.org and the free PBS App, available on iPhone, Apple TV, Android TV, Android smartphones, Amazon Fire TV, Amazon Fire Tablet, Roku, Samsung Smart TV, and Vizio.
Providing Support for PBS.org
Learn Moreabout PBS online sponsorship[ Power saw whirring ] [ Mid-tempo music plays ] The two projects on today's episode of "The Woodsmith Shop" are seating options that are easy to build.
The first up is this stool that Logan designed for the bench in his workshop.
But honestly, I think it would look just as great in a kitchen or in a dining room next to an island or a countertop.
The other project Chris designed way back when he started here at Woodsmith.
It's this cedar garden bench.
It's lightweight but will stand up to years of outdoor use, and it folds up for easy storage.
If you're ready to build one or both of these projects, the plans are at our website, WoodsmithShop.com.
But for now, it's time to head over to the lathe for Logan to get started on the stool.
Announcer: Major funding for "The Woodsmith Shop" has been provided by... Old Masters -- offering wood stains and finishes for the woodworking enthusiast and professional.
And by... Kreg -- from the first cut to the final assembly, providing woodworkers with products that help to simplify woodworking challenges.
Kreg.
Additional funding provided by... ...Titebond Wood Glues -- the pro's advantage.
And by...
Here at Grizzly, woodworking isn't just our business, it's our passion.
We love what we do.
Thank you for the opportunity to support "Woodsmith Shop" TV.
♪♪ ♪♪ ♪♪ So the first of our two seating projects is going to be a stool that's in the Shinto style.
It's kind of an Asian design, and it's really interesting.
And I like it because you can customize it for use in different areas of the house.
You can make counter height, bar height, or perfect height to use in your shop just by adjusting the length of the legs.
Now, what I'm going to use today is going to be ash.
I think it really leans into that Asian style really well, and it's going to play nicely with this design.
All right, so I have our seat blank flipped upside down, and I've drawn a bunch of lines on it.
And those lines mean a couple things.
Let me explain that.
So, first, I've marked four locations that are going to be our mortises for our legs that we'll make it a bit.
Now, our leg connection is going to be through this tapered socket.
So I have a reamer that's going to cause us to taper the tenon on the leg.
And then I have a reamer in this brace that we'll use to taper the hole.
So we're going to taper the tenon and taper the mortise.
So those are those four mortise locations.
Now, these holes are going to be drilled at an angle, okay?
The angle of the bit is approximately 12.5 degrees, but because that bit is leaning, we need something else to line that up to.
And that's called sight lines.
And that's what these guys are.
These are set at a 30-degree angle from parallel to those lines.
And this drill guide that I have set up has two little notches in it.
And those kind of act like sights.
And I can use those to align this right in line with those sight lines and place that bit right where my mortise is going to be.
And now everything's lined up.
I'm going to do that for each of those four mortise locations.
All of them will be angled away from the center of the board, approximately.
[ Blowing ] Okay.
So, we have our four mortises angled away from the center.
Now we have to go make some legs to go and fit into those mortises.
And one of the things that I like about this turning project is it's about as simple as you can get.
We're gonna take these square blanks, we're gonna turn them round, and then we're gonna add a couple of small tapers.
One of the things that I don't want to do is to over-tighten the tailstock.
By pushing those two ends together, you can actually cause a little bit of tension and wobbling in the center.
So as I'm turning this, if I notice there's any little bit of bounce in the center, I might just loosen that a little bit and see if that takes care of it.
So now that's set up ready to go.
We'll move the tool rest into place.
And then what I'm going to do is start by just using a spindle roughing gouge, and I'm just going to bring this entire thing to a cylinder.
I'm going to do that with the speed set pretty high because this is a small-diameter spindle.
I want to turn it about as fast as I can.
All right.
Now, that leg's really rough still, but that's okay.
I've knocked off the corners, and it's cylindrical enough that I can go in and add the rest of my layout lines, and then as I'm turning it, once it gets a little bit closer to round, I'll be able to use my hand to help steady it and keep vibration down.
So what I'm going to do now is I'm going to lay out some points with this little template that I've made.
And all this is, is a piece of plywood.
And I've added brad nails in three different spots.
And those are going to kind of designate three important areas of this leg.
The first is the top, the other end is the bottom.
And then I have another brad right here about a third of the way down, and that's going to be the fattest point of this leg.
So what I'm going to do is, I'm going to turn the lathe on, I'm going to hold this up, and I'm going to use those nails that I've clipped the heads off on to score lines on here.
And that's going to be my guide.
And then I'll come in with my parting tool, and I'll set my diameters at each of those points.
The top point is going to be 1 inch, at the bottom is going to be 1 3/16".
And then the fattest point is maybe 1 3/4".
So I'll go ahead and set those points with the parting tool.
And then I have three areas that are my targets.
And all I have to do is connect those and then sand the legs smooth.
All right, so now that I've roughed everything down with the spindle roughing gouge, I'm making some final passes with the skew chisel.
Now, the skew chisel is a little bit harder to use, but it leaves a much nicer surface.
And even though I'm probably going to paint these legs, I want to get down to a pretty smooth surface to begin with before I start sanding.
So what I'll do is I'll just guide this skew along the tool rest, and I'll wrap my hand around the leg.
And that's to help stabilize it and keep it from bouncing, because there is quite a bit of flex here in the center of this leg.
All right, so a couple hours at the lathe.
I now have four legs, three long stretchers, and two short stretchers.
And now we have to make the tenons on these legs match the mortises we drilled earlier.
And that's a two-part process.
The first is, we have to shape these tenons.
And we're going to do that with this tenon cutter.
And this is basically a large, industrial-size pencil sharpener.
Tenon fits in there, and then, as you turn the leg, that tenon cutter just shaves off a ribbon of fibers off the end of that tenon.
You end up with something that looks like this.
It's a tapered tenon.
So now we have to make those mortises match.
And to do that, we have a matching reamer here.
Now, that reamer matches the angle of that tenon cutter, so in theory, as we're reaming out the holes that we drilled earlier, we can keep checking this fit until it fits how we want, and then we're done.
So the thing with reaming holes like this is that you can actually steer the hole.
So we want to make sure we're staying in line with our sight line still and we're not angling too far one way or another.
So the easiest way I found to do this, and it looks goofy, is to put your palm on top of the brace, put your forehead on it, and then kind of watch as you're turning it and reaming out the hole.
So it doesn't look like you're taking out a whole lot, but you want to continually grab one of those legs and just test that fit.
Now I can feel it's getting tight in there, but I can't feel the end of that tenon poking through yet.
So this is going to take me a bit to ream out all these holes.
Now, as I'm putting these legs in place, I'm looking at the angle of them because the tenons might not be perfectly concentric.
So sometimes when you rotate a leg, it can change the angle ever so slightly.
So what I like to do is look down each direction, look at the legs, see any that are out of alignment, and rotate them and see if I can bring everything back into equal balance.
And once I've done that, I'll go ahead and mark a line on the inside of each leg and number each leg.
So now we can go ahead and add the stretchers.
What I've done here is, I've used a wooden rule, and I've used a couple of spring clamps to hold that in place.
And what I've done is, I've measured up from the bottom of the seat to the bottom of this rule, and that's where the first stretcher is going to go.
And that's going to be the center line.
And I've already turned the stretchers here.
These guys are basically just like the legs.
They're simply turned, and then I tapered the end down to match a 3/4-inch Forstner bit.
So now what I can do is come in here with a drill... and I can line everything up, drill those nice and parallel, being careful not to go through the back side, and then fit those in place.
So, the final thing to take care of before we glue up this stool is going to be to shape the seat.
And I've already done that here.
Let me kind of explain how I did that.
The first thing I did was, I kind of roughed in an arc on the top of the seat, and I cut that away at the bandsaw.
Now it's a big cut, so you just have to go slow and follow that line as closely as you can.
And then I went ahead and added a chamfer on the bottom side.
Did that at the router table with the chamfer bit.
I chose a 30-degree bit on this, and I think it looks really nice.
So now here I am at the bench cleaning up that surface left by the bandsaw.
The bandsaw does leave a lot of saw marks, so I'm going ahead and taking care of those with a specialty chair-maker tool called a travisher.
This travisher is more or less a hand plane-type setup where there's a sole and a blade, and you can kind of control the depth of the cut by how far you roll this tool.
Now, this is usually reserved for something like a Windsor chair, but it works really well on this, also.
And what I like about this, besides a nicely made tool that was really fun to use, is that it leaves a slight texture on the surface.
And then I'm going to glue together the base.
And there's a certain step we have to follow with the base.
I'm going to use an epoxy as I'm assembling that.
I'm going to apply epoxy with a little bit of filler into the mortises and on those tendons.
And I'm using epoxy for two reasons.
First, if there's any gaps in that joint, the epoxy will fill it.
And second, epoxy's a good, strong bond and it gives me a lot of open time.
That means I have time to wiggle all those joints together, get everything fit nicely before I apply a couple of strap clamps around it to hold it together, and it's going to hold together for a long time.
Then once that undercarriage is all assembled, I'm going to slip it into the top.
And that top is going to have those tenons poking through.
I'll go ahead and kerf those and add wedges once that's in place.
Then once the epoxy is dried, I can go in and trim those tenons off, sand everything smooth, and then it's ready for a finish.
Our folding bench project has two things we need to watch out for.
One is it has curves, and the other is that it moves.
It folds up.
And that means we need to be careful about how we make our parts.
We want a right part and a left part to be mirror images of each other.
And any holes we drill, they've got to match because it's going to matter down the road when we assemble it and start using the bench.
So to make sure that we get accurate parts, the best way is to use templates.
Now, with this project, there are downloads available for all the different parts, and they're tiled.
It's a pretty simple procedure.
Just follow the directions of cutting off one edge and taping them together sequentially.
That's what I've done here.
But I've also taken those paper templates and I've glued them onto some 1/4-inch Masonite.
Masonite works really well for creating a permanent template that we can trace around.
So with this done, I'm going to go to the bandsaw and I'm going to cut these out.
And I'll be at the drill press and I'll drill the holes out.
Well, after bandsawing the templates, I went ahead and cleaned them up a little bit with some sandpaper, smoothed out the curves, and drilled the holes for the bolt holes.
Now I've got 1 1/2-inch thick cedar here.
I've got all my parts laid out, so here I've got parts for the seat and then the rear leg and the front leg.
So we're going to start by drilling holes.
Then we'll go to the bandsaw.
And then I'm going to do an 1/8-inch roundover on all the edges to ease things up, make sure they're smooth, clean, and ready to go.
And after that, we'll start on slats for the seat.
I've got a lot of four quarter cedar cut up here at the table saw.
And we're going to go ahead and rip some.
Some of it will be 2 1/2 inches for the main slats of the seat in the back, and some will be 2 inches which will form a frame for the seat.
After ripping a lot of stock on the table saw, I went ahead and selected out the best pieces.
Cedar has a lot of knots.
You have to expect a little waste.
The pieces I have here are for the slats for the seat and for the back.
What I need to do now is drill holes for the screws.
Now, there's a lot of screw holes, and I really don't want to waste a lot of time marking out each one and leaving pencil lines, which are a problem to get rid of.
The cedar has sort of a rough texture on top, and I like that, and I want to keep it.
And if I start marking it up with a pencil, well, there's no good way to get rid of it.
So what I have done is I've set up two stops on either side of my drill bit, and I can merely slide the part from one side to the other to get it in the correct location.
So time to drill some holes.
After rounding over all the edges of the slats, I took one of them and I cut a handhold.
Just drilled two holes, I used my saber saw to clean out the excess, and then the router to round things over.
It's going to be real handy when it comes time to move our bench to a nice shady spot in the yard.
So I'm going to go ahead and line this up.
I'm going to pre-drill.
And put in a screw.
Now, I'm using stainless steel fasteners, and they're a good choice because cedar has a lot of tannin in it, and it does tend to rust screws pretty fast.
So by using stainless, we know this is going to last.
All right.
With everything in place, I'm going to go ahead and just set these aside.
I'll take a framing square.
And the shapes are a little odd here, but we can get pretty close and make sure that everything is nice and square.
All right.
So we have three remaining slats to put in place.
And to do that, I'm just going to go ahead and lay them out and space them evenly.
So we just want to look for a good, even appearance here.
There, I think that's got it.
So pre-drill and I'll run some screws in.
All right, to give the seat a little more support, we have a structure underneath it.
I've got it on blocks right now, but it consists of a front and back piece of frame and some heavy members which are cut out to the profile of the seat.
So I'll get this lined up.
I've got some holes pre-drilled and ready to go.
So I'm going to start in the back because this support member here has to line up with our handle that we put in this back slat.
You're going to notice that the front slat does not go all the way to the ends here.
There's actually a bit of a gap.
And that's because of our folding mechanism.
Gives everything a little bit of clearance.
Assembling the back of our bench goes exactly like assembling the seat.
What I've done here is, I've gone ahead and put the top and lower of the back slats in place, got one screw, and then I went ahead and put a brace that also goes between the two legs.
One screw, as well.
So we'll take a square.
And I want to make absolutely sure that things are looking good.
I think they are.
And now I'll go ahead and sink in the screws to lock things in place.
And then, just like with the seat, I'm going to lay in three slats in between here, space them evenly, sink those screws in, and we'll be done with the back assembly.
All right, we're getting to the fun part, which is the final assembly.
What I've done is, I've taken our back frame and I've bolted these two legs in place.
And I also added a stretcher between the two legs.
So I've got a carriage bolt.
There is a washer in between these two parts.
Another washer and a nut.
For right now, though, what we need to do is we need to bolt the seat to these legs.
So let's go ahead and get that done.
And just like with the back to these legs, we're going to use a carriage bolt.
And I'm going to need to put a nut in between the two pieces, which makes it a little... a little more interesting to get it all together, but not too hard.
Add another washer and a nut.
Okay, now I'm just going to leave all the nuts loose right now until we get things in their final state and I'm happy with the fit and how everything is working.
But eventually I do want to use a little bit of threadlocker to keep the nuts from moving.
And I'll seat the heads of the carriage bolts.
So let's take a look right now where we're at.
And so you can see, our bench is starting to take shape.
Well, now we need to make two aluminum straps to keep that seat in position.
You can see this is my finished strap here.
So there's a sequence of events that need to happen.
First off, I've got a 10-inch strip of aluminum cut, and I went ahead and rounded the corners.
You can round them with a file.
I used a small belt sander.
However you want to do it.
Now we need to mark the location of these bolt holes.
And as long as we're busy marking things, I'm going to make two layout lines on each end to help me with this bend.
First thing I'm going to do is, I'm going to take the Sharpie and I'm going to put a little ink down on each end around where that bolt hole goes.
And that's just going to help me see my layout lines and make it a little easier for me to use a punch and mark that location.
So with that done, gonna take my ruler, and I want to be 5/8 inch from the end.
I'll do that on each end.
Now I can mark the center the other direction.
There we go.
And now I'm going to take a small center punch and make a hole.
Now, we also need to make layout lines to help us with this bend.
So I'm going to go ahead and mark in 1 1/4 inch.
And then I'll mark 1 3/8 inch beyond that.
And I'm not going to bother with the magic marker here.
I'm gonna put my aluminum up on a little block to give me some room to put a small square down.
And scribe the line.
And there we go.
So with that done, let's go to the drill press and drill our bolt holes.
Making the bends in our strap is both easy and it's kind of fun.
So, first thing I'm going to do is take this lower layout line and line it up at the top of the vise.
I'm gonna want to use a little square and make absolutely sure that I've got my part vertical.
Tighten it down.
There's a lot of different tools you could use to create the bend.
You could use a big adjustable wrench.
I'm going to use this F-clamp.
I'm going to line up the lower part of the jaw of my F-clamp right on that line, the upper layout line.
The nice thing about the F-clamp is it gives you a good handle.
So nothing to it.
You're just going to grab the jaws of the clamp, grab the back of it, and give everything a twist.
We want a nice, clean, 90-degree bend.
Now we're going to flip our part over and repeat the procedure.
Only this time we're going to bend in the opposite direction.
And there we go.
All right, it's time to get the straps on and finish this project up.
So I've got a carriage bolt through our seat side, and I'm going to use a 1-inch nylon spacer to pack off our strap.
Put that on.
And now I'm going to put a washer and a nut.
♪♪ ♪♪ All right, that is the bench in its folded-up position.
There's the bench ready to sit.
And so what's left?
Well, I need to put some threadlocker on the bolts, I'll put a nice outdoor finish on, and then it's a glass of iced tea and a book.
We're done.
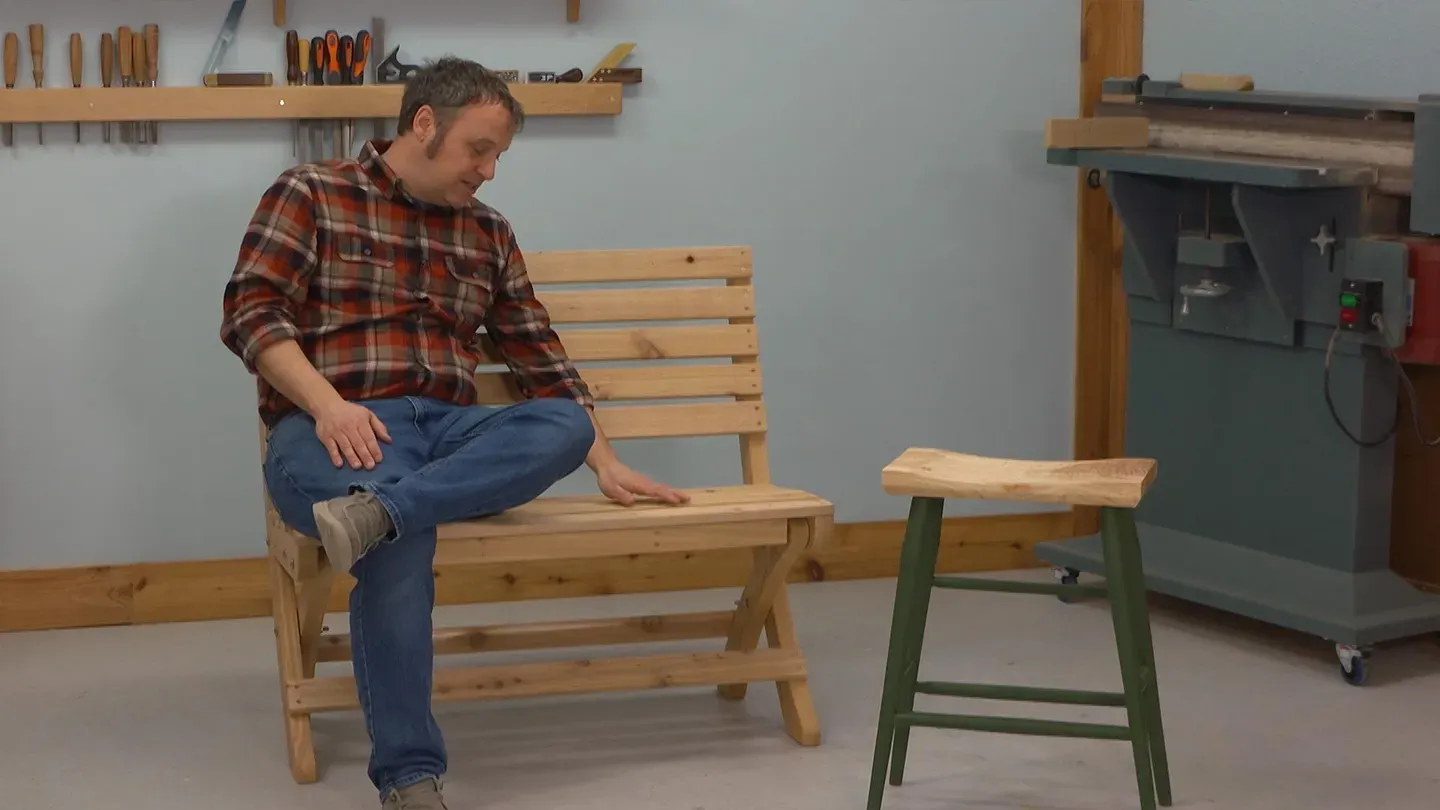
The two projects featured in today's episode, this folding garden bench and this stool, are great ways to get started in building your own seating.
Now, whether you go from here into chairs and other projects, that's up to you.
But if you're ready to get started building one or both of these projects, the plans are at our website, WoodsmithShop.com.
There you'll find a lot of other great project ideas and plans.
You'll also find videos and tips and techniques to help you become a better woodworker.
And then when we're ready, we can join right back here to build another great project in "The Woodsmith Shop."
♪♪ ♪♪ If you'd like to get more video tips and techniques, sign up for the free weekly Woodsmith eTip.
Every week, you'll receive an e-mail with a video tip to get more out of your table saw, router table, and more.
Sign up at WoodsmithShop.com.
Everything in today's show comes from the newly expanded Woodsmith Guild Edition with shop projects, plans, tips, and techniques.
To get a free preview issue of the Woodsmith Guild Edition and a free Woodsmith book, go to WoodsmithShop.com.
In addition, past seasons of "The Woodsmith Shop" are available on DVD, or you can watch them online from your computer, tablet, or mobile device.
For more information, go to WoodsmithShop.com.
Announcer: Major funding for "The Woodsmith Shop" has been provided by... Old Masters -- offering wood stains and finishes for the woodworking enthusiast and professional.
And by... Kreg -- from the first cut to the final assembly, providing woodworkers with products that help to simplify woodworking challenges.
Kreg.
Additional funding provided by... ...Titebond Wood Glues -- the pro's advantage.
And by...
Here at Grizzly, woodworking isn't just our business, it's our passion.
We love what we do.
Thank you for the opportunity to support "Woodsmith Shop" TV.


Support for PBS provided by:
Woodsmith Shop is a local public television program presented by Iowa PBS