Sliding-Door Buffet
Season 18 Episode 1812 | 26m 46sVideo has Closed Captions
This mid-century modern project is sure to grab your attention.
This mid-century modern project is sure to grab your attention. Made from solid walnut and featuring show-stopping veneered doors. It’s loaded with plenty of storage options as well as a lot of important woodworking skills and lessons.
Problems playing video? | Closed Captioning Feedback
Problems playing video? | Closed Captioning Feedback
Woodsmith Shop is a local public television program presented by Iowa PBS
Sliding-Door Buffet
Season 18 Episode 1812 | 26m 46sVideo has Closed Captions
This mid-century modern project is sure to grab your attention. Made from solid walnut and featuring show-stopping veneered doors. It’s loaded with plenty of storage options as well as a lot of important woodworking skills and lessons.
Problems playing video? | Closed Captioning Feedback
How to Watch Woodsmith Shop
Woodsmith Shop is available to stream on pbs.org and the free PBS App, available on iPhone, Apple TV, Android TV, Android smartphones, Amazon Fire TV, Amazon Fire Tablet, Roku, Samsung Smart TV, and Vizio.
Providing Support for PBS.org
Learn Moreabout PBS online sponsorship[ Power saw whirring ] ♪♪ Welcome back to "The Woodsmith Shop."
It's a really special episode for me today.
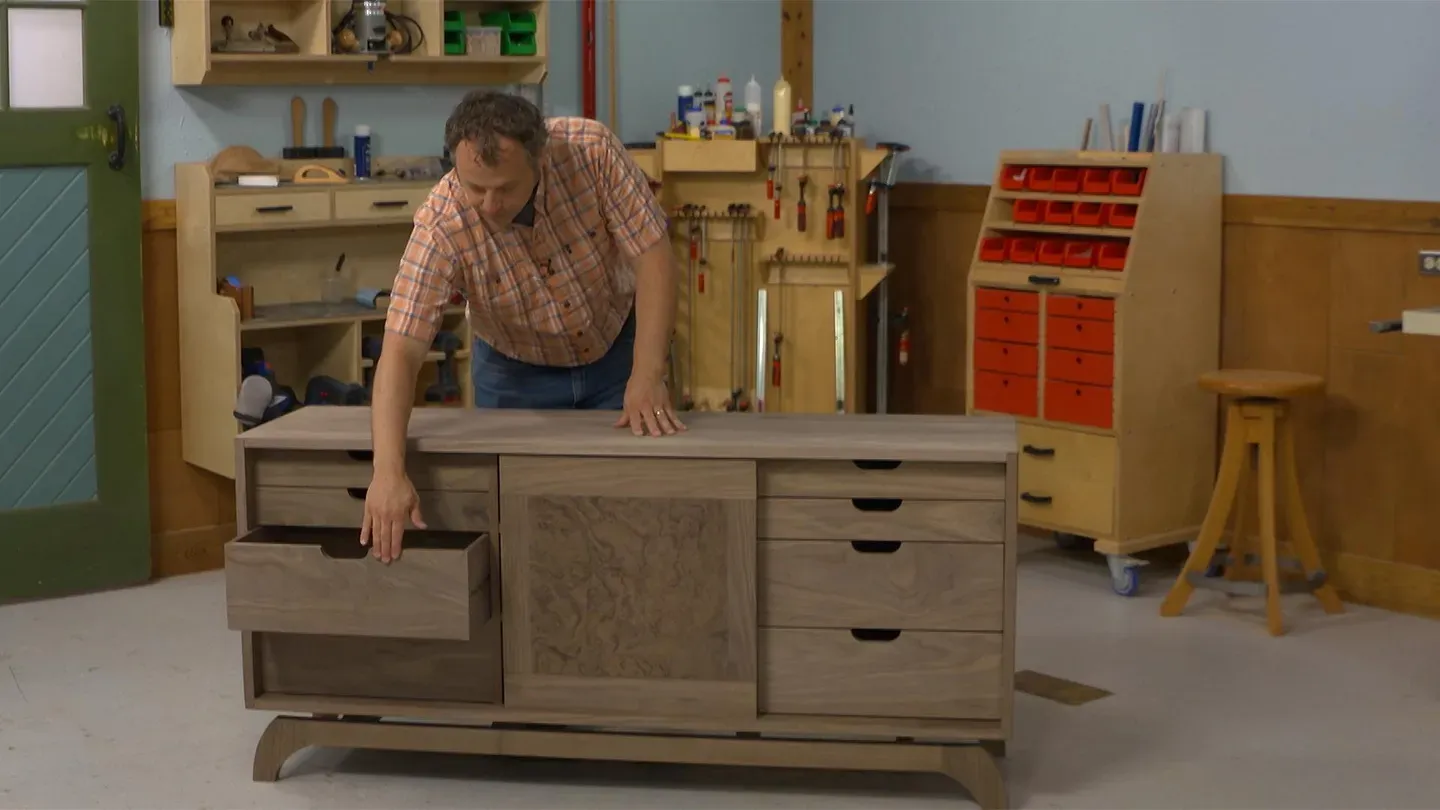
The project we're making is this buffet.
Now, it's based off of one that I made for my sister a few years ago.
She asked for one for her dining room and likes the mid-century modern style.
So, as you can see here, we have those really clean lines, the geometric forms, accented with some subtle curves in there, and then we punched it up with a few things.
You'll notice the sliding doors here that have the veneered panels.
They're bypass doors so that you can set them up and arrange them however you want.
Moving them to the middle reveals the drawer cases on either side, so there's four drawers there for plenty of storage.
♪♪ In the middle are a set of adjustable shelves to put some of your most precious items on display here.
If you're ready to build along with us, the plans are at our website, WoodsmithShop.com.
For now though, let's get started with Chris on building the case.
Announcer: Major funding for "The Woodsmith Shop" has been provided by... Old Masters -- offering wood stains and finishes for the woodworking enthusiast and professional.
And by... Kreg -- from the first cut to the final assembly, providing woodworkers with products that help to simplify woodworking challenges.
Kreg.
Additional funding provided by... ...Titebond Wood Glues -- the pro's advantage.
And by...
Here at Grizzly, woodworking isn't just our business, it's our passion.
We love what we do.
Thank you for the opportunity to support "Woodsmith Shop" TV.
♪♪ ♪♪ ♪♪ The case for our sideboard consists of six pieces -- a top, a bottom, two ends, and two dividers.
So I've got all my parts milled out.
They look good.
Nice walnut.
Now it's time to think about joinery.
So what I'm up to now is I'm going to be cutting rabbets on either end of the top and the bottom, and those rabbets will join nicely with the sides.
And when we glue things up, we'll add a few dowels and a few screws to really make for a secure connection.
I like the rabbet joint because it indexes my sides to the top and bottom.
Things aren't squirming around and it makes for an easy glue-up.
Now, along with the rabbets on the ends of the top and the bottom, I also need to put a rabbet on the back edge of top and bottom and the sides to house a 1/4-inch plywood back.
Well, I've got all the joinery squared away on the panels, so on the top and the bottom and on the ends I've got a rabbet for our back.
On the top and the bottom is a great big rabbet on the ends here for the ends of our cabinet.
And the top and the bottom also have a plow, a little deeper on the top, a little shallower on the bottom, which our doors will fit into, our sliding doors.
So what's next?
Well, next we tackle the dividers.
We're going to take a little departure from all these rabbets, and we're going to use a type of joinery called biscuit joinery.
And that's what this is here.
It's a compressed beech wafer.
We have a special machine that'll make a slot in both the divider and in our top or bottom to accommodate the biscuit.
Hey, it is time for that fun part of every project, and that is time to glue things up.
So first off, I am using liquid hide glue to slow things down, give me a little more time, make it easier.
First thing I'm going to do is I'm going to go ahead and glue the biscuits into the top and the bottom that hold the dividers, and that'll just simplify things for me when it comes time to maneuver all these parts around.
I'm now going to put a fairly generous amount of glue on the ends here on these big long rabbets.
And now I'm going to go ahead and put our ends on.
Okay.
With the ends in place, it's now time to deal with our dividers.
So I'm going to put some glue down in these kerfs.
Spread that a little bit.
All right.
So now it is time to deal with the top here.
So what I'm going to do is I'm going to start by putting glue in my biscuit slots.
♪♪ ♪♪ Well, I've got the case out of the clamps.
So what now?
Well, if you remember, we drilled a number of holes in these ends.
Now I need to plug those holes.
I've got some 1/4-inch walnut dowel, and I've cut some long and some short.
I'm going to use some hide glue.
And I'm going to use a little paintbrush here.
I'm going to put a little bit of glue into each of these holes.
After I cut each of these dowels, I did bevel the ends of it just to make it a little easier to drive them in.
And that completes this end.
So I'm going to go ahead and put the dowels on the other end, wait for the glue to dry, trim the dowels flush.
Then I want to go over the case and carefully sand, do a little hand plane work, get it all cleaned up, lightly bevel the edges.
And with that, I think we'll be ready to move on and make the base.
The front of our sideboard features two sliding doors.
They fit into the grooves that were cut in the top and the bottom, and they're designed to be able to slide past each other in order to change the look of how the sideboard is, or to be able to get at different parts of the storage that are inside.
Now, ordinarily on a door, I start with the frames, then make the panels and glue everything up.
But for this, the panels are made from veneered plywood so that they really stand out in how it looks.
So I want to give the glue and the veneer plenty of time to dry and settle down before I need to use those panels.
So that's what I'm starting with first.
The veneer for the outside face of the doors we selected as walnut burl, and you can see here that it looks pretty cool.
It's got kind of a wild grain pattern and from a distance looks a little bit like worn leather.
So I really like how this looks.
This is pretty pricey though.
And what you want to do with a veneered panel is put veneer on both sides of the substrate, which is going to be a piece of plywood.
That way, the moisture transfer during seasonal changes in humidity will be even, and it's going to allow that panel to stay flat over time.
So while the front side is all fancy, the backside can be any veneer, really, and we have some leftover straight-grained walnut that I'm going to cut some pieces of for that a little bit later on.
Now, the trick with burl veneer is that it's pretty brittle.
It's really thin slices of wood, and you need a good way to cut it.
What I'm going to use is a rotary fabric cutter.
You can pick these up at any hobby or craft store.
They work along the same principle as a pizza cutter.
So you would do it just like cutting pizza.
What I'm going to use though, is a straightedge to make sure that I can create, oddly enough, straight cuts.
So I'll hold the straightedge down and make a slice here.
There we go.
Now, I want to cut these pieces a little bit oversize, and we'll trim them later on.
I have my mild-mannered alter ego veneer on one side here, and I have the two pieces of the superhero veneer over here.
Now, because these were cut from matching sheets of veneer, you'll notice that the pattern aligns really well.
It's almost identical.
Now, for these sliding doors, what I'm going to do is flip one of them over so I've created a book match veneer so that, when the doors are side by side, you can see that matching veneer, and it's going to be much more visually appealing.
Here's how this is going to work.
I'm going to take the glue and apply a thin coat across one face of the panel.
I have a notched spreader here to be able to spread it out and get an even coat.
Now I can set the veneer in place, kind of press it down in different places, and then very carefully flip it over and we'll apply glue to the other surface of the substrate.
From there, we can apply the backing veneer.
Now I'm going to set down another piece of melamine over the top and repeat this whole process for the other door panel.
With this humongous sandwich here, I'm going to set up clamps all the way around.
While the panels for our doors are drying in the clamped up assembly there, we can focus on the joinery for the doors themselves.
So I have the rails and stiles here, and I'm going to join each of those pieces with short hardboard splines, kind of like biscuits or loose tenons.
Now, the way I'm going to do that is to cut a groove in all the parts using a slot cutter here in the router table.
One of the things you want to do is, even though I've tried to make sure that this bit is set up so that it'll cut a centered groove, it might not be perfectly so.
What I've done is to put a white triangle on the two matching parts here.
So these are the two stiles for the right-hand door.
The upper and lower rails have their own matching triangle, as well.
That also tells me that I want to keep those faces up, and then I'll know what are the inside edges that receive the grooves.
One other detail when you're routing... is, for this to work, we need to rout a slot on the end of the stiles, as well, but these are pretty narrow pieces that can be tough to keep square to the bit.
The solution is to use a push block made just from some scrap piece of plywood that I had that will guide the workpiece past the bit holding its square.
And a little side benefit is that it stops chipout on the backside, as well.
Once the glue is dry on the veneer, you want to trim it flush to the plywood panel behind it.
Ordinarily you'd think flush trim bit in the router table.
However, any glue globs that ran over the edge are going to make that a hazardous proposition.
Instead, I like to use a file and just kind of saw my way horizontally across the piece.
It does a really good job.
You might get some minor chipping, but that's why we made these panels a little bit bigger.
So, over at the table saw, I trimmed them to size, which brings us right back here to the router table.
I'm going to use a slot cutter like I did before.
And I used one of my pieces, referencing off the back face of the door frame pieces, to set the height of the slot cutter.
Now I'll run a groove around all four edges of the door panels so that we can assemble the doors using thin hardboard strips, kind of like a loose tenon to keep everything together.
With our doors complete, the last thing that we need to do is to fit them to the case of the buffet.
What you're going to do is trim the top runner and the bottom runner, but they get trimmed differently.
What you want is this upper runner to be longer, and the bottom one just big enough to catch in the groove on the case bottom.
And I'll show you what I mean here is, when I slide this in place... ...you want to slide the door all the way up so that the top of the rail meets the underside, and then be able to pivot.
I go for a pretty snug fit here.
Pivot that lower part into the case bottom.
You want the doors to slide smoothly.
I spent some time with a shoulder plane and a block plane fine tuning the thickness of those runners and then adding a chamfer on the top and the bottom in order to be able to get those in.
Once this is all complete, I'll add some wax to make sure that the doors slide smoothly.
So what you can see now is how it sets up so that you can cover the two drawer compartments or... ...slide them together in the middle to create different looks with the doors.
With these all wrapped up, it's time to tackle the drawers.
The drawers for this buffet really add a lot of storage options to the whole case.
I mean, you could use all shelves on the inside, but you're going to make more of the space by having some drawers.
We're going to do eight on the two outer compartments of the case.
And drawer joinery is one of those places where you can really show off.
Here we're going to go for a more restrained approach.
I have a big stack of all the drawer parts here.
Some of them are kind of roughly sized right now so that we can fit them to the case as we go along.
At the front of the drawer, we're going to use rabbets.
So I have a dado blade installed in the table saw here with an auxiliary fence to set the width of that rabbet.
It's going to match the thickness of our drawer sides.
I'll cut a rabbet on both ends of the drawer fronts.
Then I'm going to reposition the rip fence, and I'll cut the same size dado just a little shallower in the drawer sides in order to house the back of the drawer.
After that, with an even smaller Dado setup, we'll cut a groove in all of the parts to house the drawer bottom, and then from there, we can move over to the router table to talk about how we're going to install these drawers in the case.
Before we assemble and install the drawers, what we need to do is figure out the mounting system.
Now, there are going to be some hardwood runners that could installed on the inside of the case back there, and they'll fit into grooves that get cut on the outside edges of the drawer sides.
The key thing here, though, those runners are going to act as stops for the drawer as well.
So where this groove stops on the drawer sides needs to be consistent from side to side.
To make things easy, what I've done is put an arrow on the top edge of all of my drawer sides so that I know what's going to be the reference edge up against the router table fence.
I'm going to make two types of cuts.
One is going to be a plunge cut that I rout through to the end.
And then, the other one is going to be a stop cut with a stop block for half of them down here, and then, for the other half on the opposite edge.
It sounds confusing, but the solution to it is to make a hardboard template like this.
The whole process is explained.
There's a video on our website, WoodsmithShop.com.
So what I'm going to do now with the stop block located on this end is rout a groove on the drawer side so that, as you're looking at the drawer, it'll be all the left sides of the drawer pieces.
I'll start by lowering the side over the spinning bit, and then continuing the cut until it exits from the end of the side.
For the other side, I'll move the stop block to the opposite end of the fence, and then just push the drawer side through the bit until it contacts that stop block.
After shaping the cutout on the front of the drawers, they're ready to be assembled.
Now, what I did is to lay out two clamps on my benchtop, and then applied glue to all the grooves, the dados, and the rabbet joints.
Then I can bring the bottom into one of the sides, along with one of the backs.
Then you can bring the other side into place and then slip the front into place.
What I did from there is use those two clamps to apply that side-to-side clamping pressure, and then added a few more clamps just to make sure that the drawer front was fully seated onto the sides.
Then it's the waiting game until they're all set up.
Then we want to install them into the case.
For that, like I said, we're going to use sets of wooden runners that get screwed to the inside of the case.
What I like about this is, because they're made from wood, you can fine-tune their position really easily, and that's why we've left the back off of the case so far here, is that I can get at it from all the sides.
If the drawers are a little tight side to side, I can take a couple of swipes with a hand plane across each face to loosen that up.
Or if they're binding top to bottom, you can run a shoulder plane along the top or the bottom edges to trim that, and it works out really well.
Plus, I like that sound and that feeling of the drawer.
Sliding in on solid wood guides.
A little bit of wax, and they ride really smoothly.
The trick, though, is getting everything spaced correctly.
We sized the drawers for 1/8-inch gap in between.
So here's how this is going to work.
I have a couple of setup blocks here.
I'm going to set those on top of the drawer below.
Set the drawer box on top of that.
Then, from the backside, I can slip the two runners into the grooves, line them up with my layout lines, and then attach the runners using the back two screws.
That locks it into place.
Pull the drawer out, install the final two screws on each side there, and I'm all set to go.
The base of this buffet consists of a couple of parts.
We have these long stretchers that run the length of the case.
Connecting those, we have a series of shorter stretchers, and you'll notice that these are a little bit taller than those long stretchers are.
That's going to lift that case up a little bit off of this base and add a little bit of separation there.
Now, on the ends of these long stretchers, we'll have a couple of feet, but we'll talk about those in a minute.
So you can kind of see that this is a -- It looks like a ladder.
It's kind of a ladder laid on its side.
So we have to connect all of these parts together.
So how are we going to do that?
Well, what we're going to do is we're going to use this.
And this is a loose tenon cutter.
This looks very similar to a biscuit cutter.
But instead of using a circular cutter, it uses a router bit that oscillates back and forth.
What it does when you plunge it into the workpiece is it creates a slot just like this.
And into that slot, we're going to insert a loose tenon.
And a slot on both pieces with that loose tenon creates a really strong joint that's easy to cut.
Now, we do have to think about how we want to lay these parts out and cut them, because this does have a fence that you can use to reference the top of the parts, and that works really well if all your parts are the same orientation.
But because these guys are taller, we would be cutting them in reverse.
Now, I could reference off the bottom side, and that would work just fine.
But this is where I like to think out of the box.
And instead of using that top fence, I like to use the base of this cutter as my reference point.
So what I'm going to do is I'm going to put this loose tenon cutter on top of a piece of 1/2-inch Baltic birch plywood.
That's going to raise our reference up by 1/2 of an inch.
And then, I've already marked center lines on my long stretchers, and I'm going to line that center line up with the center line on this cutter, and I'm going to make that plunge cut.
And as that bit oscillates, it's going to create that slot.
I'll do that on both these long stretchers and on the ends of these short ones.
So, you see, a loose tenon cutter like this really makes quick work of the joinery.
Now I got the small stretchers connected to the big stretchers.
Now we have to connect the feet.
And I've already done that.
What I did is I took the foot block, which is a block of material that doesn't have the foot cut out yet, and I laid that at the end of these long stretchers.
And I made sure to number each one because I'm just going to strike a mark across those.
That's going to be to line up that loose tenon cutter.
Then I can flip that fence down and use the fence to register the top face of the workpiece and cut that joint.
So now we have a foot block attached to our long stretches.
Really, the only thing stopping us from gluing this up is cutting a little bit of shape on the foot.
And to do that, I have a template here for the feet.
Obviously, I have the template on one side, and I'll just flip it over here for the other end, and I'm going to lay that shape out and then cut it at the band saw and then go ahead and sand it smooth.
But a little bit of forethought will help us in our glue-up process.
What I'm going to do first is I'm going to cut this inside section away.
I'm gonna do that before I glue this up.
That's going to leave us kind of a club foot here with a square edge, and that's going to allow us to apply clamps across this entire thing.
If I cut that entire foot to shape, I'm left with a rounded end, and it just becomes a little bit more difficult to clamp together.
Once I have this glued together, then we can come back, cut this outside shape, and sand that smooth.
And while I'm at the band saw, I'm also going to take care of these small stretchers.
These small stretchers just have a little scoop out of each corner, just to kind of ease that transition to the bottom of the case.
And I'll do that with a small band saw blade and then take that over to the drill press and put a drum sander in it just to touch that up.
Once I have those all cut, it's time to come to the bench and glue it all back together.
So there we are.
That base is glued up.
Now, one thing I really like about that loose tenon joinery is it kind of takes some of the pressure off of a glue-up.
So much so that I will use a fairly short open time glue as I'm assembling this.
So now I'm going to go ahead and let this glue cure.
And then, once it's done, it just needs a little bit of sanding, a finish, and attached to the case.
You know, building the original version of this buffet was really fun for me to do and present it as a gift for my sister.
One of the other things, though, was all the different woodworking techniques that I was able to work into this, so it made a lot of fun for me to build, as well.
Whether it's working with the veneer for the door panels on here or creating a lot of solid wood components -- the runners and the drawer slides, the sliding doors, even reinforcing the case with biscuits and dowels and minimizing the amount of visible hardware that there is -- it's all part of the fun of working in your shop and crafting something for somebody that's special to you.
If you're ready to build one of these, you can check out the plans.
They're at our website, WoodsmithShop.com.
There you'll also find other videos, project ideas, plans, and more to help you become a better woodworker.
We'll build some more projects and then meet right back up here for another episode of "The Woodsmith Shop."
♪♪ ♪♪ ♪♪ If you'd like to get more video tips and techniques, sign up for the free weekly Woodsmith eTip.
Every week, you'll receive an e-mail with a video tip to get more out of your table saw, router table, and more.
Sign up at WoodsmithShop.com.
Everything in today's show comes from the newly expanded Woodsmith Guild Edition with shop projects, plans, tips, and techniques.
To get a free preview issue of the Woodsmith Guild Edition and a free Woodsmith book, go to WoodsmithShop.com.
In addition, past seasons of "The Woodsmith Shop" are available on DVD, or you can watch them online from your computer, tablet, or mobile device.
For more information, go to WoodsmithShop.com.
Announcer: Major funding for "The Woodsmith Shop" has been provided by... Old Masters -- offering wood stains and finishes for the woodworking enthusiast and professional.
And by... Kreg -- from the first cut to the final assembly, providing woodworkers with products that help to simplify woodworking challenges.
Kreg.
Additional funding provided by... ...Titebond Wood Glues -- the pro's advantage.
And by...
Here at Grizzly, woodworking isn't just our business, it's our passion.
We love what we do.
Thank you for the opportunity to support "Woodsmith Shop" TV.


Support for PBS provided by:
Woodsmith Shop is a local public television program presented by Iowa PBS