Small Shop Solution
Season 18 Episode 1806 | 26m 46sVideo has Closed Captions
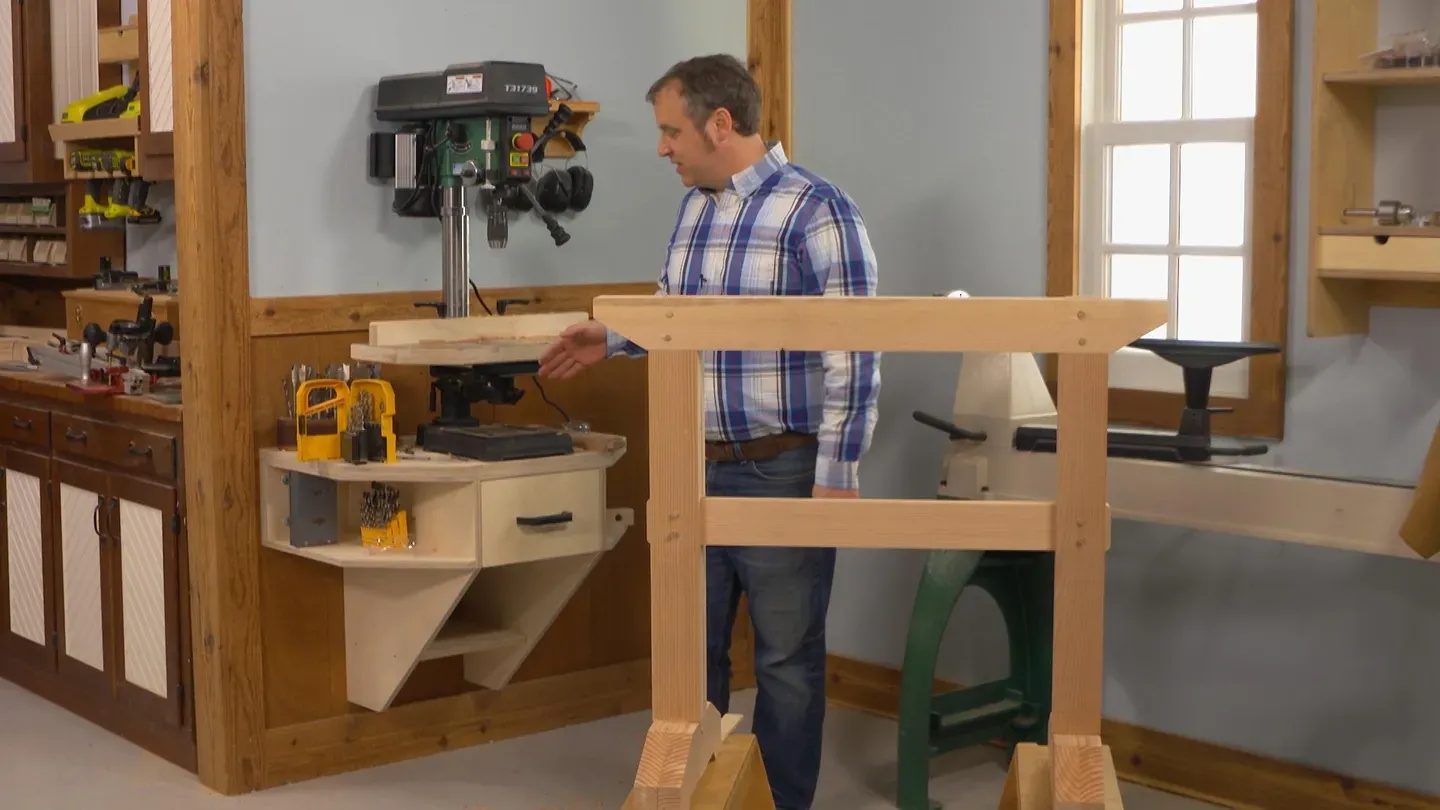
Benchtop power tools offer great features in a small size. You just need a place to put them.
Benchtop power tools offer great features in a small size. You just need a place to put them. In the Woodsmith Shop, the cast builds a wall-mounted station for a new drill press. While they’re at it, they assemble a couple sawhorses.
Problems playing video? | Closed Captioning Feedback
Problems playing video? | Closed Captioning Feedback
Woodsmith Shop is a local public television program presented by Iowa PBS
Small Shop Solution
Season 18 Episode 1806 | 26m 46sVideo has Closed Captions
Benchtop power tools offer great features in a small size. You just need a place to put them. In the Woodsmith Shop, the cast builds a wall-mounted station for a new drill press. While they’re at it, they assemble a couple sawhorses.
Problems playing video? | Closed Captioning Feedback
How to Watch Woodsmith Shop
Woodsmith Shop is available to stream on pbs.org and the free PBS App, available on iPhone, Apple TV, Android TV, Android smartphones, Amazon Fire TV, Amazon Fire Tablet, Roku, Samsung Smart TV, and Vizio.
Providing Support for PBS.org
Learn Moreabout PBS online sponsorship[ Power saw whirring ] [ Mid-tempo music plays ] Welcome back to the Woodsmith Shop.
It's time for a couple of shop projects today.
Now, benchtop tools like this drill press offer a lot of versatility in a compact package.
The problem is, where are you gonna put it?
Now, for a drill press like this, a normal bench can be just too tall.
So on today's episode, we're building a workstation that's mounted to the wall and lets you set the drill press at exactly the right height that you need and offers some easy-access storage to go with it.
Any drill press is even better with a table-and-fence system.
So that's the second part of our upgrade for this drill press.
Every shop needs a stable full of good sawhorses, and Logan's gonna show us how to make a nice stout version.
It's made from construction lumber, so he's gonna show you how to process that material to create accurate, flat, and stable project parts for it.
If you're ready to upgrade your shop, the plans for all of these projects are available at our website, WoodsmithShop.com.
It's time to build.
Announcer: Major funding for "The Woodsmith Shop" has been provided by... Old Masters -- offering wood stains and finishes for the woodworking enthusiast and professional.
And by... Kreg -- from the first cut to the final assembly, providing woodworkers with products that help to simplify woodworking challenges.
Kreg.
Additional funding provided by... ...Titebond Wood Glues -- the pro's advantage.
And by...
Here at Grizzly, woodworking isn't just our business, it's our passion.
We love what we do.
Thank you for the opportunity to support "Woodsmith Shop" TV.
♪♪ ♪♪ ♪♪ ♪♪ Our drill press work center is made out of plywood.
Most of it's single thickness, but I've got two pieces which are glued up.
And so the question is, how do we glue up a big large piece like this?
This is gonna be the top.
Well, it would take an awful lot of clamps or an awful lot of cinder blocks to clamp things securely.
There's an easier way, and it's super simple.
I'm just gonna use screws.
I may not have a thousand clamps around here, but I've got a lot of screws.
So what I've done is I've roughly laid out the dimensions of my top on my rough stock, and that allows me to lay out holes accurately, to make sure that none of my holes end up on a joint, a seam, or someplace where I don't want it to see.
So I'm gonna spread some glue, clamp everything together with these screws.
When the glue is dry, I'm gonna take the screws out.
That way I don't have to worry about sawing into them, and, hey, I can reuse the screws.
So let me go ahead and spread some glue, and let's clamp this up.
A lot of the parts for our drill press work center have a clipped corner.
There are a lot of different approaches you could use, and it's gonna depend kind of on how you like to work and the tools that you have.
What I've chosen to do is I've band-sawed off the waste.
I've band sawed, oh, about 1/16 to 1/8 of an inch away from the line.
Now I'm gonna joint this edge using a router.
Different approaches for routers, but the one I'm gonna use is a simple one, is that I've made a guide strip here, a guide fence, which I can set directly on my line because I've previously used my router and the bit that I have in it to cut this edge, and it just makes it super easy.
I don't like fussing around with a lot of measuring.
To me, it's just easier to have something which you can just place next to your line and it's dead nuts on.
So what I'm gonna do now is just clamp my guide on my line.
All right, we're ready to go now.
What I'm using is just a straight bit because most people, including us here, have a lot of straight bits around, so it's nothing special, but it is sharp.
And there we go.
We have a very smooth, clean jointed line.
Well, after trimming all these angled edges, I then went to the band saw and I cut a notch on each of our two sides.
With that done, we've got dadoes to cut.
I've got a dado stack in the saw that's set up specifically for the thickness of Baltic birch plywood.
And I'm gonna start by running a dado on the two inside faces of the sides.
Then I've got shelves to do, I've got a top to do, and I've got our back to do.
So a lot of cutting.
Well, it's time to start gluing up parts for our drill press work center.
First thing I'm gonna do is I'm gonna glue this back into the bottom of our top.
So plenty of glue.
Want to make sure my dadoes are neatly aligned.
I'm gonna flip it over.
And I want to go ahead and run a couple screws in here.
I'm gonna use some fairly heavy screws here because I'm going through 1 1/2 inches of wood, and this is a super important joint.
With my top flipped back over again, the next thing I'm going to do is I'm gonna put the two side pieces in.
If the drill press work center seems a little bit overbuilt, well, yeah, it is overbuilt, and with good reason.
It needs to bolt to the wall and support a heavy drill press.
So I want to make sure there's lots of material here and no wiggles, and we're gonna have a steady, stable platform for the drill press.
All right, so that's our basic platform all glued up.
So what now?
I'm gonna let everything dry.
I'll come back with a block plane, trim everything nicely.
I'm gonna smooth my corners, sand everything thoroughly, and then we're gonna add a drawer for storage.
The next step in our drill press work center is to make the drawer.
And it's a nice big drawer that's gonna store all sorts of things.
So I have parts here cut out of 1/2-inch plywood.
Now, you could use solid wood.
That's great.
I happen to have a little bit of 1/2-inch Baltic birch on hand, so that's what I'm gonna make my drawer out of.
I have a 1/4-inch dado blade set up here 1/4 inch from the fence.
The first thing I'm gonna do is I'm gonna go ahead and cut the plow for the drawer bottom, which is 1/4-inch plywood.
I'm also gonna start a little bit of joinery for a tongue-and-groove joint at the front of the drawer.
And then I'll finish up by cutting a 1/2-inch-wide dado towards the rear of the sides for the back of the drawer.
Pretty simple, pretty straightforward joinery, but it's gonna work.
And when we're done with that, it'll be glue-up time.
Well, I wrapped up my drawer parts at the table saw.
So we have a groove for the drawer bottom.
I've got a 1/2-inch dado for the back, a dado up front for this 1/4-inch tongue and groove, and I also drilled some holes in the front while it was still convenient for attaching the false front.
I'm gonna go ahead and apply glue on both sides because I really want these joints to be solid.
I'm not gonna glue the drawer bottom in.
I'm gonna let that float.
However, since it is plywood, we could glue it in.
And so if you really want to create a solid structure, that's an option.
I think one advantage of using plywood for a utility drawer like this is that the end grain of the plywood will actually hold glue very well since it consists of both face grain and end grain, whereas solid wood, it's all end grain and therefore is pretty useless for a glue-up.
And of course, I need to check and make sure it's square 'cause there's no going back, is there, once the glue is set.
Yeah, I think we're looking pretty good.
So I'm gonna clean up some of this excess glue, let it dry, and I'll be ready to go ahead and put the slides on.
I've got this one already installed.
And what I like to do is just flush the slide with the bottom side of my drawer, and that's just easy.
Lot of ways to install drawer slides, though.
I've got a couple of marks on the inside of our drill press workstand, and those relate to the bottom of the slide.
Now I'm gonna go ahead and just take it off.
And I'll just line up the slide with my two marks here.
I've got a front mark to set the draw box back about 7/8 of an inch and a line for the bottom of the slide.
Find my pencil.
I'm gonna very carefully extend the slide out because that reveals the mounting holes.
Make sure I'm still on track with my marks, and I'll go ahead and choose the location for my screw holes.
So, moment of truth.
Let me lean this thing up against the front of our workbench.
We'll slide the drawer in.
Well, there you go.
It fits.
It seems to work well.
I still need to add our false front, but because this is sort of an awkward project to work on, I'm gonna mount it to the wall.
With things up against the wall and true and level, it'll be a lot easier for me to add that false front.
All right, well, the work center is bolted to the wall.
Six long lag screws.
It's not going anywhere.
So what now?
Let me go ahead and put the drawer in place.
There we go.
Now I need to put the false front on.
So one of the tricks of putting a false front on is to make sure that the margins are even.
And the easiest way to do that is to use a bit of double-sided tape.
And the double-sided tape is gonna allow me to position my false front just where I want it, and it's gonna hold it long enough for me to get screws in behind it.
So with the tape in place, I'm going to get this nicely positioned.
Fairly even margin.
All right, with the false front in place I'm gonna use some number 8 by 1 screws.
I do have the front of the drawer predrilled so it's ready to go.
All right.
And there we go.
Now I've got a handle.
A couple screws for that.
Well, there we go.
We've got a nice deep drawer here with lots of room for storage and a super-solid place to put our drill press.
Chris's work center for the drill press raises the drill press up to a nice height and gives us plenty of flat spaces to set down all the gear that goes with working with it.
My part in part two is to make a table for it.
This drill press does come with a small table, but it's really not meant for woodworking.
This is the table that we had for our previous drill press.
And as you can see, there's a lot of features on here, but it's a little overkill for this smaller drill press.
We need to provide some clearance for the handle and just bring it down in scale.
So it's time for me to head over to the table saw and start cutting down the parts that we need for this new table.
Our drill press table starts out just like the work center.
It's two layers of plywood.
I cut each piece over at the table saw, and then back here at the bench, squirted some glue on one of them and then clamped them all together.
Since this is a much smaller than the workbench top, I didn't have to use screws like Chris did, though that's still a possibility.
What I want to do now is lay out some of the details that we need to form on this table.
Two of those details are a pair of slots that will allow us to use clamps to secure a workpiece.
I have one laid out here, and I'll lay out the other one.
It's 5 3/4 inch in from the end.
Then it's 3 inches from the front edge.
And then overall, the slot -- center to center -- is 5 inches long.
Now the slots will be an inch wide, but I only need to lay out the center lines because we're gonna start shaping those by drilling out the ends over at the drill press.
What I need to do now is lay out a few other things.
The corners get dog-eared, just like our work center.
I'm also gonna lay out an opening in the middle here so that we can put a replaceable insert that can back up the drill bit, but then we can still refresh it as we need to.
And then the last thing is to lay out a notch on this back corner that provides some knuckle clearance when you want to raise and lower the drill press table.
We're kind of moving from a square, rectangular block of plywood into something that resembles a drill press table a little bit more here.
So I've been to the band saw, where I lopped off these corners here, and then set up the fence for a couple of positions to create this notch.
First this little end piece and then the long part.
Using the fence there helps make sure that this stays nice and square.
Does it really matter on a shop project?
Not really, but it does look better.
What I need to do now is to clean up the slots.
I did use a jigsaw to kind of do connect the dots between the end holes that I drilled, but that leaves sort of a sloppy edge.
What I've done is put down some plywood strips on either side of the slot, right on those layout lines, and I'm gonna clean them up with a router.
Now, the thing is, I don't have a bit long enough to make this in one pass, so I'm gonna do it in two parts.
The first is to use a pattern bit, which has a bearing way up at the top here.
That bearing is gonna follow along the strips and rout away as much material as I can.
For the second part, I'm gonna flip the table upside down and then put in a flush trim bit.
This one, again, flush trim bit has a bearing down at the end.
The bearing will follow along the material that I've cleaned up already, and then remove any of the remaining, uh, waste that needs to come out there.
The last detail that we need to take care of is, remember I laid out a recess for a replaceable insert, so I'm going to put some plywood strips on here.
I've taped them down in a pinwheel fashion to define that rectangle.
And since that's gonna be a much shallower recess, I'm using just this wee little pattern bit here to make that cut.
And I'm gonna do that in several passes, kind of stepping my way down so I get a nice smooth cut and allowing all of those chips to kind of clear out.
You can see now the slots are well formed and we got the recess all taken care of.
Now you could start using the table this way, but on a shop project like this, in addition to color, like to add some durability with a plastic laminate.
So we're going with a charcoal gray look here.
There's lots of colors and patterns for you to choose from.
The nice thing is, it's easy to install.
I'm going to use spray adhesive and spray a coat on the top of the table and the backside of the laminate.
Then you wait for it to dry, press the two pieces in place, and then roll it out nice and smooth.
Then we'll come back with a router and trim everything flush with the flush trim bit.
All right.
Before coming over here to the table saw, I used a router and a chamfer bit to ease the edges on the outside, as well as the slots here.
That's gonna keep the laminate from chipping in use.
Our next step here is to inset a couple of lengths of aluminum T track into the tabletop.
We'll use that for attaching the fence as well as hold-downs and clamps for securing small pieces.
I'm gonna do it with a dado blade here, but the dado blade isn't as wide as the T-track, so I'm gonna have to do it in a couple of cuts.
All right, we're wrapping things up here on the drill press table.
Last thing to do is to make a fence.
Kept things simple here.
Used an offcut from the table glue-up for the fence.
Two layers of plywood glued together.
Drilled some holes for T bolts and these adjustable handles so that you can easily position the fence wherever you want to.
All in all, I'd say this two-part drill press upgrade is a great way to have a benchtop drill press work even harder.
You know, in the shop, having an extra set of hands can sometimes be invaluable.
One of my favorite sets of extra hands to have are these -- a pair of sawhorses.
One of the things I like about this pair of sawhorses is they're made here in the shop using commonly available dimensional lumber from a hardware store, and they're extremely heavy duty.
They're probably heavier duty than the stuff you can buy from the store anyways.
One thing I like about this is that the joinery is super simple.
We have three mortise and tenons on each side, but because this is glued up from dimensional lumber, we can actually create that joinery before we glue anything up.
That simplifies the process.
And if you'd like a set of plans to build your own set of sawhorses, plans are available on our website, WoodsmithShop.com.
So I'm gonna go ahead and get this off, get some parts in here, and I'll show you how we make this joinery.
Okay, what I have here are two pieces of material that are gonna form one of the feet of our sawhorses.
Now, as you can see, I've laid out the mortise location as if these two were glued together.
But then -- open them up like a book -- I've also laid out the interior faces, so this is the material that we have to cut away.
And then once we've removed this large notch out of each piece, when we go ahead and glue that together, that's gonna form the mortise.
It's much easier to do it this way than chopping this out once everything is glued up.
So to form this, first thing I'm gonna do is I'm gonna take my saw and I'm gonna cut down these lines.
I'm looking for an accurate cut, but it doesn't have to be precise because we're gonna form the tenon to fit.
Once I've cut down to the baseline here, I'm gonna use the chisel, and I'm just gonna knock away all this waste in the center.
That's gonna leave us a pretty rough surface.
So then I'm gonna come back with the router plane, and I'm gonna set my depth of my blade.
That's gonna be 3/4 of an inch on each piece, which is gonna leave us with an 1 1/2-inch mortise.
Then I'm gonna smooth out those inside faces to give us some good glue surface, and then we'll be ready to glue these feet together.
Now, with these joints, we are just going for parallel faces on the inside.
They don't need to be super pretty.
At this point, we're kind of in a timber-framing mindset.
As long as that joint is tight, we don't really care what inside of it looks like.
So I have both of those cut, and then you can see when I put them together, they form a mortise.
So that's how we're gonna make all the mortises on this set of sawhorses.
So now we're gonna glue them together.
Now that I have all the mortises cut and all the parts glued up, we can go and concentrate on creating the tenons.
So here I have one of those leg blanks or foot blanks that we glued up.
We have the mortise, and now we're gonna create a tenon to match that mortise.
So what I've done is I've laid out a couple of lines.
I have lines across the end grain and then down each face.
And those are gonna create the cheeks of the tenon.
And then I have this baseline all the way around that's gonna create my shoulder.
Now, we're only gonna have shoulders on two opposing faces.
There isn't any shoulders on the two faces that are facing me and on the back side.
So now what I'm gonna do is I'm gonna grab my same saw, and I'm gonna create this cut straight down.
And the key here is I want to stay on the waste side of the line.
Because I know that that line is gonna be a really tight fit the way it is, I want to fine-tune this once I have it cut.
And I want to fine tune it with my saw, I want to fine tune it with a plane.
So I'll go ahead and make both of these cuts.
Then I'll plop it onto the bench and create the shoulder, and then we'll fine-tune it with the shoulder plane.
Okay.
So once the tenons are cut, we have to fine-tune them to fit.
We want them to be snug enough, but we don't want to drive that joint home and where it's tight enough that it's gonna split these parts apart from each other.
So what we can do is we can use something like this guy.
This is a shoulder plane.
What makes this a shoulder plane is that the blade extends the full width of the body.
So that means I can scooch right up to that corner of the shoulder and the cheek, and I can make little shavings.
And what I'm doing here is I'm removing just a little bit off of each face.
I'm gonna make sure I rotate this part over to take equal amounts off.
It's gonna keep that tenon nice and centered.
Now, alternatively, you could use something like this, which is a float.
Now, a float is basically a file with just more aggressive teeth.
And this is a good way to make a nice flat cheek on your tenon.
So now we can go ahead and test the fit.
What I'm looking for is I just want it to slip in just like that.
Now, I could really drive that home, but because this glue's probably a little tacky still, I'm gonna wait for this to set up all the way before we drive everything home.
But in the meantime I have a bunch of tenons to cut, so I'm gonna go and get those done.
All right, with all of the tenons cut, I went ahead and spent a little time at the band saw, and I shaped not only the feet, but also the ends of the top crossmember as well.
This just gives it a little bit of shape, knocks off those square corners which are easy to catch your toes on, and it just makes it look nice.
So now we're at a point we can go ahead and assemble some of this.
Now, the assembly on this is pretty straightforward.
If you have good tight-fitting joints, great -- Glue will hold everything together nice and well.
However, for a little bit of extra security and strength, we're gonna go ahead and pin these.
So we're gonna glue this together like normal, but then once everything's assembled fully, I'm gonna go ahead and drill a hole all the way through, probably a pair in each tenon, and drive a 3/8-inch dowel through it.
And then we'll go ahead and cut that to length and keep on working.
Okay.
There we go.
So once I got all these pins installed I went ahead and start trimming them down.
Now, it's up to you whether you want to trim them flush with the surface or leave them a little proud.
I've left them a little proud.
And you can leave them just like this.
But I think once this glue fully cures, I'm gonna come in with a couple of hammers and kind of mushroom over those heads.
It's gonna kind of give it that timber-frame pin look.
But now the only thing that's left to do is to scrape off some of this glue and put it to work.
A good set of sawhorses is essential for any workshop, no matter what size it is.
I find using them from the beginning of a project for laying out the rough boards and sheets of plywood right down to the assembly and finishing, where you can create an instant work surface that's not gonna take up a lot of space when you don't need it.
Just tuck everything away in the corner.
The same holds true for the other two projects that we had in this episode -- the work center and the table-and-fence system for the drill press.
They're great accessories and help a tool that you might already have in your shop work even harder and be a little bit more easier to use, and definitely more accurate and safe.
If you're ready to upgrade your shop, the plans are at our website, WoodsmithShop.com.
That's the place where you'll find a lot more project plans, great ideas for your shop, and ways to help you become a better woodworker.
We'll build all of our projects and then gather right back here for another great project in the Woodsmith Shop.
♪♪ ♪♪ ♪♪ If you'd like to get more video tips and techniques, sign up for the free weekly Woodsmith eTip.
Every week, you'll receive an e-mail with a video tip to get more out of your table saw, router table, and more.
Sign up at WoodsmithShop.com.
Everything in today's show comes from the newly expanded Woodsmith Guild Edition with shop projects, plans, tips, and techniques.
To get a free preview issue of the Woodsmith Guild Edition and a free Woodsmith book, go to WoodsmithShop.com.
In addition, past seasons of "The Woodsmith Shop" are available on DVD, or you can watch them online from your computer, tablet, or mobile device.
For more information, go to WoodsmithShop.com.
Announcer: Major funding for "The Woodsmith Shop" has been provided by... Old Masters -- offering wood stains and finishes for the woodworking enthusiast and professional.
And by... Kreg -- from the first cut to the final assembly, providing woodworkers with products that help to simplify woodworking challenges.
Kreg.
Additional funding provided by... ...Titebond Wood Glues -- the pro's advantage.
And by...
Here at Grizzly, woodworking isn't just our business, it's our passion.
We love what we do.
Thank you for the opportunity to support "Woodsmith Shop" TV.


Support for PBS provided by:
Woodsmith Shop is a local public television program presented by Iowa PBS